
Snacks
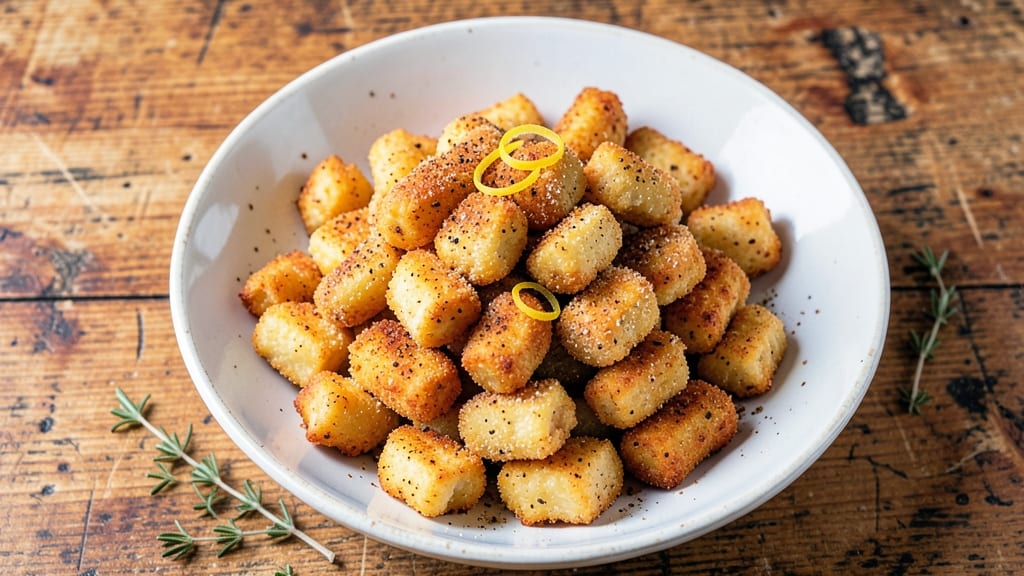
This air fried cheese curds recipe transforms simple curds into golden, crispy bites with a molten center—no deep frying required. The secret lies in the right seasoning and air fryer temperature, which creates that perfect contrast between shatteringly crispy exterior and gooey, pull-apart cheese inside.
I’ve tested countless variations, and this method delivers restaurant-quality results in just 10 minutes.
The process is simpler than you’d think: start with fresh cheese curds, lightly coat them in flour and spices, then air fry at high heat for even browning. The key is not overcrowding the basket—this ensures every curd gets hot air circulating around it for maximum crispiness.
A pinch of smoked paprika or garlic powder elevates the flavor without overpowering the natural cheesiness.
What you’ll end up with is a snack so addictive, you’ll want to make a whole batch at once. Serve them warm with marinara for dipping, sprinkle them over salads for a cheesy crunch, or enjoy them straight from the air fryer as a quick, satisfying bite.
The texture is what makes them unforgettable—crispy on the outside, gooey on the inside, with that perfect snap when you bite through.
This recipe is perfect for game day, movie nights, or whenever you crave a snack that’s both indulgent and easy to make. The best part? You can customize the seasoning to suit your taste—try adding a dash of cayenne for heat or herbs for a savory twist. Let’s get cooking!
Ingredients for air fried cheese curds
Crispy, gooey cheese curds need just 10 ingredients—no deep fryer, no fuss.
| Ingredient | Amount | Notes |
|---|---|---|
| Fresh Cheese Curds 🧀 | 16 oz | Store-bought or homemade, room temperature |
| All-Purpose Flour 🌾 | ½ cup | For light coating, sifted |
| Smoked Paprika 🌶️ | 1 tbsp | For that smoky depth |
| Garlic Powder 🧄 | 1 tsp | Enhances cheesy flavor |
| Ground Black Pepper 🌶️ | ½ tsp | Freshly ground for best flavor |
| Kosher Salt 🧂 | ½ tsp | Diamond Crystal preferred |
| Cayenne Pepper 🔥 | ¼ tsp | Optional for heat lovers |
| Olive Oil 🫒 | 1 tbsp | For light brushing |
| Fresh Parsley 🌿 | 2 tbsp | Chopped, for garnish |
| Marinara Sauce 🍅 | 1 cup | For dipping, optional |
The curds are everything here—fresh from the cheese counter (the kind that squeaks when you bite them) make all the difference. Wegmans or local dairy stores usually have the best quality, but grocery store brands work too. Look for curds that are firm but still slightly soft—they should hold their shape but still have that melt-in-your-mouth magic. If you’re making a big batch, Costco’s cheese curds are a game-changer for bulk cooking. Pro tip: take them out of the fridge 30 minutes before cooking so they’re room temp—cold curds won’t crisp up right.
No smoked paprika? Regular paprika plus a pinch of liquid smoke works in a pinch. Short on garlic powder? Fresh minced garlic at half the amount gives a brighter flavor. The cayenne is totally optional, but if you’re feeling spicy, add it to the flour mix before coating. For extra crunch, toss the curds in crushed cornflakes or panko after the flour. And if you’re out of olive oil, avocado oil or melted butter works just as well—just don’t skip the light brush, or they’ll stick to the air fryer basket.
These stay crispy for about 15 minutes after air frying, so eat them fresh or reheat in the air fryer for 2-3 minutes. Store leftovers in an airtight container for up to 3 days, but honestly, they’re so addictive you’ll eat the whole batch first. Freezing? Not recommended—they lose that perfect texture. Garnish with fresh parsley right after cooking for a pop of color, and always serve with warm marinara for dipping. Trust me, you’ll want to make a double batch.
Why You'll Love This Recipe
- Crispy in Minutes: I toss the curds in flour, sprinkle the spices, and they’re golden in 12 minutes—no waiting for an oven to heat. Honestly, that’s all it takes to go from "what’s for dinner?" to "who wants seconds?"
- Smoky Kick: The smoked paprika and garlic powder turn these into something way more exciting than plain cheese. That crispy shell with the melty center? It’s like a hug for your taste buds.
- Game for Any Occasion: I keep a batch in the fridge for quick snacks, game day bites, or even as a topper for burgers. Between us, they disappear fast—especially when I’m lazy and don’t want to cook.
- Budget-Friendly Crunch: A few curds, a handful of spices, and you’ve got a snack that feels fancy but costs next to nothing. My kids think it’s a treat, and I think it’s my secret weapon for stretching meals without breaking the bank.
Step-by-step instructions for air fried cheese curds
Here's how to transform simple cheese curds into irresistible, golden-brown bites with that perfect gooey center.
Prep the Spiced Flour Coating
In a medium bowl, whisk together the 0.5 cup all-purpose flour, 1 tablespoon smoked paprika, 1 teaspoon garlic powder, 0.5 teaspoon ground black pepper, 0.5 teaspoon kosher salt, and 0.25 teaspoon cayenne pepper. I like to sift the flour first for a lighter, more even coating—this prevents clumps that can make the curds unevenly crispy.
Real talk: Don't skip the sifting. Those little flour lumps will make some curds turn into flour bombs instead of crispy delights. The smoked paprika adds that smoky depth that makes these curds taste like they've been hanging out at a Wisconsin cheese festival, while the cayenne gives just a hint of kick for those who love it spicy.
Lightly Brush and Coat the Curds
Using a pastry brush, lightly coat each of the 16 oz fresh cheese curds with the 1 tablespoon olive oil. This step is crucial—it helps the flour adhere better and creates that beautiful golden crust. I press each curd gently into the flour mixture, making sure every side gets an even dusting. Don't overcrowd the bowl or the curds will stick together.
Here's the thing—you want the curds to be coated but not buried in flour. Think of it like giving them a light dusting of powdered sugar before baking. If they're too heavily coated, they'll burn before the inside gets gooey. Let the coated curds sit on a plate for 5 minutes while you preheat the air fryer—this gives the flour time to fully adhere.
Air Fry in Batches for Perfect Crispiness
Preheat your air fryer to 375°F for 3 minutes—this ensures even cooking from the start. Working in batches (don't overcrowd!), place the coated curds in a single layer in the air fryer basket, leaving about ½ inch between each curd. This spacing is non-negotiable—it prevents them from steaming instead of crisping.
Air fry for 6-8 minutes, shaking the basket every 2 minutes, until the curds are golden brown with crisp edges. You'll know they're ready when they release easily from the basket and the edges have that perfect crunch. If you wait too long, they'll turn into cheese crisps instead of gooey bites. Remove them immediately—they'll continue cooking slightly from residual heat.
Garnish and Serve Immediately
Transfer the hot curds to a serving platter and sprinkle with the 2 tablespoons chopped fresh parsley. The parsley adds a fresh contrast to the smoky, spicy flavors and makes the dish look restaurant-worthy. Serve them immediately with the 1 cup marinara sauce on the side for dipping—this is where the magic happens.
Each bite should deliver that satisfying crunch followed by a molten cheese center that makes your taste buds dance. If you're serving a crowd, keep the air fryer at 200°F to stay warm while you finish the batches. Trust me, these disappear faster than you can say "Wisconsin cheddar."
Pro Tips For Making Air Fried Cheese Curds
- USE 365°F, NOT 400°: Cheese curds melt fast—start at 365°F for 6-8 minutes, then bump to 390°F for the last 2-3 to get a crispy crust without turning them into goo. I learned this the hard way after watching a batch turn into a sad, greasy mess.
- PAT DRY CURDS FIRST: Wipe them with a paper towel before dredging—wet curds won’t stick to the flour, and you’ll end up with uneven coating. Sounds like a small step, but it’s the thing that actually changes the outcome.
- SKIP THE DOUBLE-DREDGE: One quick flour dip is enough—double-dredging makes them dense and gummy. Just toss them in flour, shake off excess, and let the air fryer do the magic. (Yes, even if you’re impatient like me.)
- CHECK FOR DONENESS EARLY: Curds go from perfect to rubbery fast—test one at 5 minutes. If it’s golden and holds its shape when poked, pull them. Overcooking turns them into sad, chewy bites, and nobody wants that.
Creative variations of these flavors
Spicy Kick Variations
For heat lovers, add ½ teaspoon cayenne pepper to the flour mix and a pinch of chili powder for a smoky kick. I’ve found that Worcestershire sauce (just ½ teaspoon) mixed into the marinara adds depth—it’s a game-changer for balancing the heat.
If you want extra spice, toss the cooked curds in 1 teaspoon crushed red pepper flakes right before serving. 🌶️
Herb-Infused Flavors
Swap the smoked paprika for 1 tablespoon dried oregano and 1 teaspoon dried thyme for a Mediterranean twist. Fresh herbs like chopped dill or basil (about 1 tablespoon) mixed into the marinara sauce elevate the flavor profile.
For a French bistro vibe, add 1 teaspoon onion powder and ½ teaspoon dried tarragon to the flour coating.
Sweet and Savory Twist
Add 1 teaspoon brown sugar to the flour mix for a caramelized edge—trust me, it’s addictive. A sprinkle of crushed cinnamon (just ¼ teaspoon) gives a subtle sweetness that pairs perfectly with the tangy marinara.
For a dessert-like treat, drizzle the cooked curds with honey and serve with dark chocolate sauce instead of marinara.
Crunchy Coating Upgrades
Swap the all-purpose flour for ½ cup crushed cornflakes mixed with 1 teaspoon garlic powder for an extra-crunchy texture. Panko breadcrumbs (½ cup) work too—just add ½ teaspoon dried parsley for a savory boost. For a cheesy crunch, mix ¼ cup grated Parmesan into the flour before coating the curds.
Global Fusion Flavors
Try a Mexican street corn vibe by adding ½ teaspoon chili powder, ¼ teaspoon cumin, and a pinch of cotija cheese (crumbled) on top. For a Southern U.S. twist, add ½ teaspoon Cajun seasoning and serve with spicy remoulade instead of marinara.
A Japanese-inspired version swaps smoked paprika for 1 teaspoon furikake seasoning and serves with soy-glazed dipping sauce.
Nutrition facts
Frequently asked questions
Can I use frozen cheese curds for this recipe?
Fresh cheese curds are ideal because they hold their shape and melt perfectly. Frozen curds work in a pinch, but they often release more moisture, which can make them less crispy. If you must use frozen, thaw them completely in the fridge overnight, then pat them very dry with paper towels before coating. This helps absorb excess moisture and improves crispiness.
Why did my cheese curds turn out greasy instead of crispy?
Overcoating with flour or oil is the most common culprit. Use just enough flour for a light dusting—think of it like seasoning, not breading. Also, make sure your air fryer is preheated and the curds aren't overcrowded. If they're too close together, they'll steam instead of crisp. Try air frying at 375°F for 6-8 minutes with ½ inch spacing between each curd.
What's the best way to reheat leftover air-fried cheese curds?
Reheat in the air fryer for 2-3 minutes at 350°F to restore that crispy texture. Microwaving will make them soggy, and oven reheating can dry them out. For extra crunch, brush with a tiny bit of olive oil before reheating. Leftovers stay crispy for about 15 minutes at room temperature, so eat them fresh or reheat immediately.
Can I make these cheese curds gluten-free?
Swap the all-purpose flour for ½ cup gluten-free all-purpose flour or ½ cup crushed gluten-free cornflakes. Just make sure your seasonings (like smoked paprika) are certified gluten-free. The texture will be slightly different but still delicious. For extra binding, mix in 1 tablespoon cornstarch with the gluten-free flour to help the coating stick better.
What's the secret to getting that perfect gooey center?
The magic is in the timing and temperature. Use fresh, room-temperature curds (not cold) and air fry at 375°F for exactly 6-8 minutes. The high heat creates a crispy exterior while the inside stays warm and melty. Overcooking turns them into cheese crisps—remove them as soon as they're golden brown and pull away from the basket easily.