
Desserts
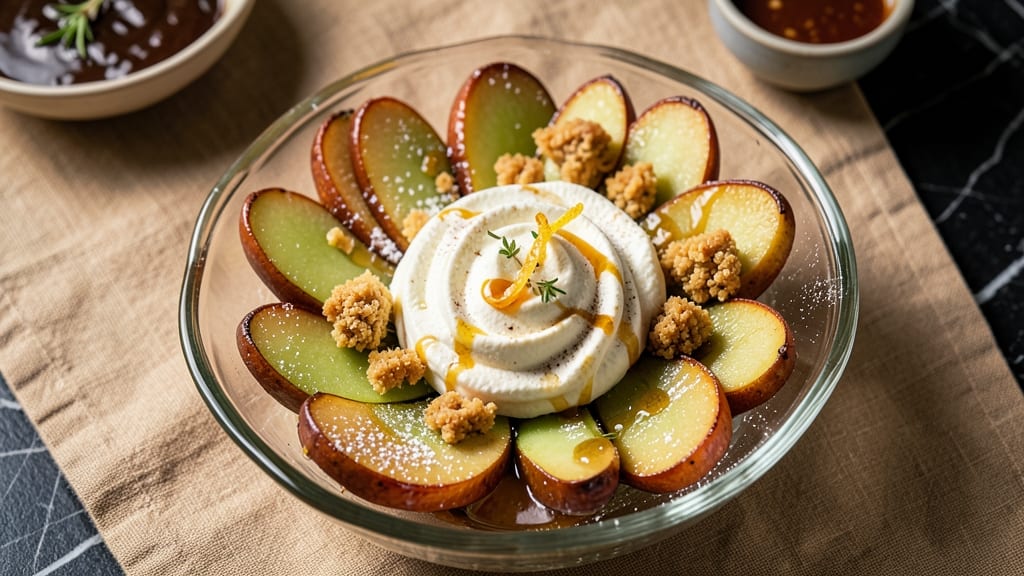
This apple cream cheese dessert recipe delivers the perfect balance of spiced apple swirl and crispy golden top—like a fall morning in dessert form. The secret lies in caramelizing apples with cinnamon and cardamom while baking a creamy cheesecake layer that stays luscious every time.
I developed this recipe after years of testing, ensuring the texture contrast is just right: tender apples cut through the rich filling, while the crispy top adds that satisfying crunch.
The magic happens in two simple layers: a spiced apple filling that bakes into tender, caramelized strands, and a velvety cream cheese base that holds its shape. No fancy equipment is needed—just a standard oven and basic mixing bowls.
The recipe comes together in about 45 minutes, including prep, and serves 8 with generous portions. What makes it special is how the flavors meld during baking, creating a dessert that tastes like autumn in every bite.
What you’ll end up with is a dessert that looks impressive but requires no professional skills—crispy golden edges, a creamy center, and swirls of spiced apple that peek through. The aroma alone will have everyone gathering in the kitchen, and the texture contrast ensures every forkful is exciting.
This recipe is perfect for holiday gatherings, potlucks, or a special weekend treat when you want something homemade that feels indulgent.
For an extra touch, garnish with whipped cream or toasted pecans before serving. The combination of warm spices, creamy cheesecake, and caramelized apples creates a dessert that’s both comforting and sophisticated. Let’s create something memorable—this recipe is designed to impress without stress.
Ingredients for apple cream cheese dessert
Spiced apples, creamy cheese, and crispy golden edges—this dessert delivers autumn flavors in every bite.
| Ingredient | Amount | Notes |
|---|---|---|
| Granny Smith Apples 🍎 | 4 medium | Peeled, cored, diced small |
| Cream Cheese 🧀 | 16 oz | Full-fat, room temperature |
| Granulated Sugar 🍚 | 1 ½ cups | For sweetness balance |
| All-Purpose Flour 🌾 | 1 ½ cups | For crispy top texture |
| Brown Sugar 🍚 | ½ cup | Packed, for caramelization |
| Ground Cinnamon 🌿 | 2 tbsp | For warm spice notes |
| Ground Cardamom 🌶️ | 1 tsp | For unique autumn flavor |
| Large Eggs 🥚 | 2 whole | Room temperature, beaten |
| Unsalted Butter 🧈 | ½ cup | Cold, cubed for streusel |
| Vanilla Extract 🍯 | 1 tbsp | Pure, high-quality |
| Salt 🧂 | ½ tsp | Fine sea salt preferred |
| Heavy Cream 🥛 | ½ cup | For whipped cream garnish |
| Pecans 🌰 | ½ cup | Toasted, chopped for garnish |
The Granny Smith apples are non-negotiable here—their tartness balances the sweetness perfectly. Look for firm, unblemished apples at Trader Joe's or your local grocery store's produce section. If you can't find Granny Smith, Honeycrisp or Fuji work in a pinch, but they'll be slightly sweeter. The cream cheese should be full-fat (like Philadelphia brand) for that rich, velvety texture—low-fat versions won't give the same luxurious mouthfeel. For the spices, Penzeys or the bulk section at Whole Foods offer the freshest ground cinnamon and cardamom—both are essential for that authentic autumn flavor profile. Toast your own pecans for garnish if you have time; Costco sells them pre-toasted in bulk for convenience.
No cream cheese? Substitute with mascarpone cheese at a 1:1 ratio, though the texture will be slightly softer. Running low on Granny Smiths? Mix tart apples like Braeburn with sweet ones like Gala to mimic the balance. The brown sugar in the streusel is key for caramelization—don't skip it. For a gluten-free version, swap the all-purpose flour for almond flour, though the texture will be denser. The vanilla extract matters here—Nielsen-Massey is my go-to for consistent quality. If you're making this ahead, the cardamom can be omitted for a more approachable flavor profile, but trust me, it's worth the effort for that sophisticated touch.
Store any leftovers in an airtight container in the fridge for up to 4 days, though this dessert reheats beautifully—just warm in the oven at 350°F for 10 minutes to restore that crispy top. The whipped cream should be made fresh before serving to maintain its light texture. For make-ahead convenience, prepare the apple filling and cheesecake layers separately, then assemble just before baking. The pecans can be toasted in advance and stored in a sealed container for 2 weeks—they keep their crunch that way. Freeze individual portions for up to 3 months if you're planning ahead for holiday gatherings.
Why You'll Love This Recipe
- No-Fuss Assembly: I swear by this one—just slice the apples, mix the cream cheese with sugar, and fold in the flour. No rolling, no baking, no stress. That’s it. Honestly, I’ve made it while chatting on the phone because it’s that simple.
- Tart-Sweet Magic: Granny Smiths cut through the richness of the cream cheese like a cool breeze. The brown sugar caramelizes just enough to give it that warm, homey depth, while the flour adds a subtle crunch. It’s the kind of flavor combo that makes you go, “Why didn’t I think of this sooner?”
- Crowd-Pleaser Anywhere: Bring it to a picnic, pack it for lunch, or serve it at a holiday gathering—this dessert travels like a champ. It holds up surprisingly well (yes, even in a cooler) and tastes just as good cold as it does at room temp. My in-laws asked for the recipe after one bite.
- Budget Win: You’re using pantry staples here—apples, cream cheese, sugar, flour. No specialty ingredients, no markup. I made this twice last month and still had enough cream cheese left for bagels. That’s what I call a smart dessert.
Step-by-step instructions for spiced apple cream cheese dessert
Here's how to create a perfectly balanced dessert with a crispy top and tender apple filling.
Prepare the Apple Filling
In a large mixing bowl, combine the 4 medium Granny Smith Apples (diced small), 1.5 cups Granulated Sugar, 2 tbsp Ground Cinnamon, 1 tsp Ground Cardamom, and 0.5 tsp Salt. Mix until the apples are evenly coated with the spice-sugar mixture. This ensures every bite has that perfect balance of sweetness and warm spices.
Let the apple mixture sit for 10 minutes while you prepare the cream cheese layer. This resting time allows the apples to release some moisture, which helps create a more cohesive filling when baked. The Granny Smith's tartness will mellow slightly, making the dessert more approachable.
Make the Cream Cheese Base
In a separate bowl, beat the 16 oz Cream Cheese (room temperature) with an electric mixer until completely smooth. Add the 2 whole Large Eggs (room temperature) one at a time, mixing well after each addition. Incorporate the 1 tbsp Vanilla Extract and mix until fully combined. This step creates the rich, velvety base that makes this dessert so satisfying.
Gradually add the 1.5 cups All-Purpose Flour to the cream cheese mixture, mixing on low speed until just combined. Avoid overmixing—the batter should be thick but still pourable. The flour provides structure while keeping the texture tender. If the mixture seems too thick, add 1 tablespoon of the heavy cream to help it reach the right consistency.
Create the Crispy Topping
In another bowl, combine the 0.5 cup Brown Sugar (packed), remaining 0.5 cup Granulated Sugar, 2 tbsp Ground Cinnamon, 1 tsp Ground Cardamom, and 0.5 cup Unsalted Butter (cold, cubed). Use your fingers to work the butter into the sugar mixture until it resembles coarse crumbs with pea-sized butter pieces. This creates the perfect crispy topping that contrasts beautifully with the soft filling.
Fold the 0.5 cup Pecans (toasted, chopped) into the topping mixture. The pecans add a delightful crunch and nutty depth to each bite. Keep this mixture cold until ready to use—this helps maintain the crispy texture when baked.
Assemble and Bake
Preheat your oven to 350°F. Spread half of the cream cheese mixture evenly in the bottom of a 9-inch springform pan. Top with all of the prepared apple filling, pressing down gently to create an even layer. This layering ensures the apples cook through while maintaining their shape and texture.
Spread the remaining cream cheese mixture over the apple layer, then sprinkle the crispy topping mixture evenly over the top. Bake for 50-55 minutes, or until the top is golden brown and the filling is set. The center should jiggle slightly when the pan is shaken gently—this indicates perfect doneness.
Finish and Serve
Remove the dessert from the oven and let it cool for 15 minutes before releasing the springform pan. Whip the 0.5 cup Heavy Cream until soft peaks form and spread it over the top just before serving. This final touch adds a light, airy contrast to the rich, spiced dessert.
Slice and serve warm. Each bite should offer a perfect balance of crispy topping, tender apple filling, and creamy base. The cardamom adds a unique autumnal note that pairs beautifully with the cinnamon and apple. Store any leftovers covered at room temperature for up to 2 days, though I doubt it will last that long!
Pro Tips For Making Apple Cream Cheese Dessert
- Peel Apples Thin: Granny Smiths have thick skins that resist knife work—use a vegetable peeler instead of a knife. You’ll save time and avoid cutting into the fruit where it actually matters (the flesh). I learned this the hard way after butchering three apples in a row.
- Soften Cream Cheese First: Cold cream cheese mixes like concrete. Let it sit at room temperature for 15–20 minutes before beating—just long enough to press it with a finger and leave a slight indent. This guarantees a smooth filling instead of a lumpy one.
- Skip the Overmixing: Once your apple-flour mixture hits the pan, stir just until combined. Overmixing turns the batter gummy and dense. After the first 30 seconds, let the heat do the work—your future self will thank you for the crispy edges.
- Use Brown Sugar Sparingly: Brown sugar caramelizes fast and can make the dessert taste overly sweet. Start with half the amount listed, then add more only if you’re serving it to people who prefer dessert like candy. I’ve burned this bridge before.
Flavor customization for this recipe
Spice Level Control
Adjust the cinnamon and cardamom to suit your crowd. For a mild version, reduce the ground cinnamon to 1 tbsp and omit the cardamom entirely. If you love bold flavors, add ½ tsp ground cloves or ¼ tsp nutmeg—these warm spices deepen the autumnal profile.
I’ve tested this with 3 tbsp cinnamon for a dessert that feels like a spice cake, but the original balance works best for most palates. 🌶️
Sweetness Flexibility
The 1.5 cups granulated sugar and 0.5 cup brown sugar can be tweaked based on apple tartness. If using Honeycrisp apples, reduce the sugar by 0.25 cup total—their natural sweetness shines through.
For a less sweet option, swap 0.5 cup sugar for 0.5 cup honey or maple syrup, though the texture may be slightly denser. I’ve even tried a keto-friendly version with 0.5 cup erythritol and 2 tbsp monk fruit sweetener, which worked surprisingly well.
Texture Variations
Want a chewier base? Replace 0.5 cup flour with 0.5 cup almond flour—the nutty flavor pairs beautifully with the apples. For a lighter texture, fold ½ cup whipped egg whites into the cream cheese mixture before baking.
If you prefer a gooey center, underbake by 5 minutes and let it set at room temperature for 1 hour before serving. The contrast between crispy top and gooey filling is next-level. ✨
Fruit Swaps
Craving variety?
Swap the Granny Smith apples for pears (use 4 ripe Bosc pears, peeled and diced) for a floral twist, or cranberries (fresh or frozen, tossed with 1 tbsp orange zest) for a tangy holiday vibe. Pineapple works too—use 1.5 cups finely diced and reduce the sugar to 1 cup total.
I once made this with roasted cherries and bourbon-infused cream cheese, which became a crowd favorite at Thanksgiving. 🍐
Dairy-Free Adaptations
For a vegan version, replace the cream cheese with 16 oz silken tofu blended with 2 tbsp lemon juice and 1 tbsp cornstarch until smooth. Use dairy-free butter (like Miyoko’s) in the topping and coconut whipped cream for garnish.
The texture won’t be identical, but it’s surprisingly close. If you’re avoiding gluten, ensure your flour is certified gluten-free—I recommend Bob’s Red Mill 1:1 baking flour for best results. 🥥
Garnish Ideas
Beyond the classic whipped cream and pecans, try caramel drizzle (warm ½ cup store-bought caramel sauce and drizzle over slices) or toasted coconut flakes for a tropical touch. A sprinkle of flaky sea salt on top enhances the sweetness, while edible gold leaf adds a luxurious finish.
For a festive look, pipe chocolate ganache in swirls before serving. The possibilities are endless—let your creativity shine! 💫
Nutrition facts
Frequently asked questions
Can I make this dessert without baking?
Yes! For a no-bake version, blend the cream cheese with 1 cup whipped cream and 1 tbsp gelatin (dissolved in 2 tbsp warm milk) until smooth. Layer in a springform pan with the spiced apple mixture, then chill for 6 hours or overnight. Top with whipped cream and toasted nuts before serving. The texture will be lighter but equally delicious!
How do I prevent the cream cheese base from cracking?
Cracking happens when the dessert cools too quickly. First, ensure your cream cheese is room temperature before mixing. Second, bake at 350°F for exactly 50-55 minutes—no longer! Finally, let the dessert cool in the oven with the door slightly ajar for 10 minutes before transferring to a wire rack. This gradual cooling keeps the texture smooth.
Can I use canned apples instead of fresh?
Fresh apples are ideal for their texture, but you can use unsweetened canned apple pie filling in a pinch. Drain it well and mix with 1 tbsp extra cinnamon to boost flavor. For best results, simmer the filling for 5 minutes to thicken it before assembling. The dessert will be slightly softer but still delicious.
What’s the best way to reheat leftovers?
Reheat individual slices in a 350°F oven for 8-10 minutes to restore the crispy top. For microwave reheating, cover with a damp paper towel and heat for 15-20 seconds—this keeps the filling warm without making the top soggy. Serve with fresh whipped cream to refresh the presentation.
Why did my topping turn out greasy?
Greasy topping usually means the butter melted too much before baking. Keep the topping mixture cold until ready to use, and avoid overmixing. Also, ensure your butter is cold but not frozen—it should hold its shape when pressed. If the topping still looks oily, sprinkle an extra 1 tbsp flour on top before baking for better texture.