
Snacks
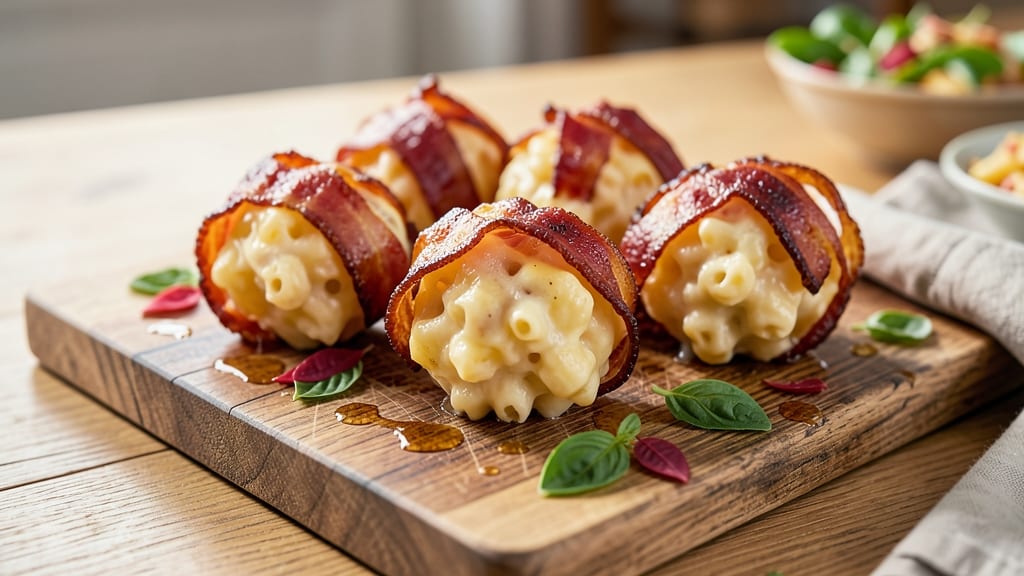
This bacon mac and cheese balls recipe delivers the ultimate comfort food in bite-sized form—crispy, cheesy, and packed with smoky bacon flavor. 🔥 The secret lies in transforming classic mac and cheese into golden, pull-apart balls that are perfect for game day or snacking.
I've perfected this recipe over years of testing, ensuring every bite has that ideal balance of creamy filling and crispy exterior.
The process is simpler than it sounds: cook bacon until crispy, then fold it into rich mac and cheese before forming into balls. A light breadcrumb coating ensures that signature crispy texture, while a final broil adds extra color and flavor.
The result? Bites that are impossible to resist, with each one offering a perfect mix of cheesy goodness and smoky bacon.
These mac and cheese balls are versatile enough for any occasion—serve them as an appetizer at parties, a snack during football season, or even as a fun lunch option. They reheat beautifully, making them perfect for meal prep.
The best part? The flavor only gets better as they sit, allowing the cheese to melt just enough to create that irresistible pull-apart magic.
With just a handful of ingredients and minimal effort, you'll have a crowd-pleasing dish that's sure to disappear quickly. Whether you're feeding a group or craving a comforting snack, these crispy bites are the answer. Let's get started on making them!
Ingredients for bacon mac and cheese balls
Crispy bacon, creamy cheese, and golden bites—just a handful of ingredients for ultimate comfort food.
| Ingredient | Amount | Notes |
|---|---|---|
| Thick-Cut Bacon 🥓 | 6 oz | Cooked until crispy, chopped |
| Elbow Macaroni 🍝 | 12 oz | Uncooked, standard size |
| Sharp Cheddar Cheese 🧀 | 2 cups | Shredded, sharp variety |
| Cream Cheese 🧈 | 8 oz | Full-fat, room temperature |
| Heavy Cream 🥛 | ½ cup | Full-fat for richness |
| Milk 🥛 | ½ cup | Whole milk preferred |
| Butter 🧈 | 3 tbsp | Unsalted, melted |
| All-Purpose Flour 🌾 | 2 tbsp | For thickening sauce |
| Garlic Powder 🧄 | ½ tsp | For subtle flavor boost |
| Panko Breadcrumbs 🍞 | 1 cup | For crispy coating |
| Parmesan Cheese 🧀 | ¼ cup | Freshly grated, for topping |
| Salt 🧂 | 1 tsp | Kosher or sea salt |
| Black Pepper 🌶️ | ½ tsp | Freshly ground preferred |
The bacon is non-negotiable here—thick-cut gives you the best crunch and smoky flavor. Oscar Mayer or Costco are my go-tos for quality, but any good bacon works. Cook it until crispy, then chop it into small pieces (about 1/4-inch) so every bite packs that smoky punch. The cheese is where the magic happens: sharp cheddar and full-fat cream cheese create that perfect creamy, stretchy texture. Don't skimp on the good stuff—pre-shredded cheese has anti-caking agents that ruin the texture.
No panko? Regular breadcrumbs work fine, but they won't be as crispy. Running short on cream cheese? Substitute with extra cheddar plus a splash of milk—just keep the ratio close. The macaroni can be any small shape (shells or cavatappi work too), but elbow is classic. For extra richness, I sometimes add a dash of smoked paprika to the cheese mix—trust me, it elevates everything. And if you're feeling fancy, swap the Parmesan topping for crumbled bacon bits for double the smoky goodness.
These reheat like a dream—just pop them in the oven at 350°F for 10 minutes until golden again. They keep well in the fridge for 3 days (though they won't last that long), and freeze beautifully for up to 2 months. I always make a double batch because they disappear faster than you can say 'game day.' Store them in a single layer on a tray before transferring to a container—prevents sticking like crazy.
Why You'll Love This Recipe
- One-Pan Magic: I swear by this recipe for lazy nights—just cook the bacon, toss in the pasta, and fold everything into that rich cheese mix. No extra pans, no stress, just hands-off baking while you sip your coffee or watch the game.
- Crispy-Creamy Obsession: The thick-cut bacon adds that smoky crunch, while the sharp cheddar and cream cheese blend creates a velvety, gooey center. Honestly, the contrast is what makes it ridiculous good—like biting into a hug from your favorite comfort food.
- Party in a Bite: These balls are perfect for game day, potlucks, or even a quick weeknight dinner. (Yes, even on a Tuesday night.) They hold together well, so you can make a big batch ahead and serve them warm or at room temp—no reheating fuss.
- Budget-Friendly Feast: Sharp chedddar and cream cheese stretch further than you’d think, and bacon makes everything feel special without breaking the bank. I’ve fed four people for under $10, and they always ask for seconds—proof it’s a solid, reliable meal.
Step-by-step instructions for crispy bacon mac and cheese balls
Here's how to turn simple ingredients into irresistible, pull-apart bites with perfect texture every time.
🔥 Step 1: Cook and Crisp the Bacon
Cut the 6 oz thick-cut bacon into ½-inch pieces and cook in a cold skillet over medium heat for 8-10 minutes, stirring occasionally. The bacon needs to render fat and crisp up—you're looking for deep golden brown edges and that unmistakable smoky aroma. Don't rush this step; crispy bacon is the foundation of these bites.
Once fully cooked, transfer the bacon to a paper towel-lined plate to drain excess fat. Chop it into small, even pieces—about ¼-inch size—and set aside. I like to keep the fat in the skillet for the next step, but if you prefer less grease, you can discard most of it. The bacon should be crispy enough to hold its shape when you handle it.
🍳 Step 2: Make the Ultimate Cheesy Sauce
In the same skillet (with bacon fat still in it), melt the 3 tbsp butter over medium heat. Whisk in the 2 tbsp all-purpose flour and cook for 1-2 minutes until it forms a smooth paste and smells nutty. This is your roux, and it's what will give your sauce that velvety texture.
Slowly pour in the 0.5 cup heavy cream and 0.5 cup milk, whisking constantly to prevent lumps. Let the mixture simmer for 3-4 minutes until it thickens slightly. Then, reduce heat to low and add the 8 oz cream cheese, stirring until completely melted and smooth. Here's the thing—if the sauce looks too thick, add 1-2 tablespoons of milk to loosen it up.
Remove from heat and stir in the 2 cups sharp cheddar cheese, 0.5 tsp garlic powder, 1 tsp salt, and 0.5 tsp black pepper. Let it sit for 2 minutes to melt completely. The cheese should be fully incorporated with no visible lumps, and the sauce should be thick enough to coat the back of a spoon but still pourable.
👨🍳 Step 3: Cook and Combine with Macaroni
While the sauce is melting, boil the 12 oz elbow macaroni in salted water (it should taste like the ocean) until al dente—about 1 minute less than package instructions. Drain well and return to the pot. Pour the melted cheese sauce over the macaroni and stir vigorously until fully coated and creamy.
Fold in the chopped bacon and mix until evenly distributed. The mixture should be sticky and hold together when pressed between fingers. If it's too dry, add 1-2 tablespoons of milk to bind it. Here's a pro tip: The sauce should be warm but not hot when you mix it with the macaroni—this prevents the cheese from separating.
🥘 Step 4: Assemble and Bake the Balls
Preheat your oven to 375°F and line a baking sheet with parchment paper. Using a cookie scoop or tablespoon, portion the macaroni mixture into 1-inch balls (about 16-20 balls total, depending on size). I like to wet my hands slightly with water to prevent sticking—this ensures the balls hold their shape.
Roll each ball in a mixture of 1 cup panko breadcrumbs and 0.25 cup freshly grated parmesan cheese until fully coated. The coating should be even and crispy-looking—this is what creates that perfect crunch. Place the coated balls on the prepared baking sheet, spacing them about 1 inch apart to allow for expansion.
🔥 Step 5: Bake to Golden Perfection
Bake for 18-20 minutes until the edges are deep golden brown and the centers are firm to the touch. The balls should look crispy and puffed, not flat or pale. If they brown too quickly, tent them loosely with foil to prevent burning.
For the ultimate pull-apart texture, broil for 1-2 minutes at the end—just watch them closely so they don't burn. Let them cool for 5 minutes before serving. The outside should be crunchy and golden, while the inside remains creamy and cheesy. Serve warm with extra bacon bits on top if you're feeling fancy!
Pro Tips For Making Bacon Mac And Cheese Balls
- CRISPY BACON FIRST: Cook the thick-cut bacon until it’s deep golden and the edges curl slightly—this is when the fat renders properly and the flavor concentrates. I used to stop at "crispy," but that left too much moisture in the mix, making the balls soggy. Push it to 5-7 minutes total, even if it means flipping less often.
- DRAIN MAC NOONER: Rinse elbow macaroni under cool water after draining to stop the cooking process immediately. Hot pasta keeps cooking in the bowl, turning it mushy when you mix in the cheese. Do this right after draining—your future self will notice the difference in texture.
- CHEESE TEMPERATURE MATTERS: Grate the sharp cheddar and cream cheese fresh and let them sit at room temp for 10 minutes before mixing. Cold cheese clumps and doesn’t melt smoothly, leading to grainy, uneven balls. I learned this after making a batch where the cream cheese stayed lumpy no matter how much I stirred.
- PRESS THE BALLS TIGHT: Use your hands to firmly pack the mixture into balls—don’t just roll them loosely. This keeps them from falling apart when baking or frying. Press hard enough that they hold shape when you lift them, but not so tight they crack (yes, I’ve done that too).
Troubleshooting this dish
Balls Too Dry
If your mac and cheese balls end up dry or crumbly, it’s usually because the mixture lost moisture during baking. To fix this, add 1-2 tablespoons of milk or heavy cream to your sauce before combining with the macaroni—this keeps the filling creamy.
For future batches, try reducing the oven temperature by 25°F (to 350°F) and baking for 5-10 minutes longer to let moisture redistribute. 💡
Sauce Separating
When the cheese sauce separates, it’s often because the heat was too high or the sauce cooled too quickly.
To prevent this, keep the sauce on low heat while stirring in the cheddar and cream cheese, and let it sit off the heat for 2-3 minutes before mixing with the macaroni. If separation happens, whisk in 1 tablespoon of warm milk and stir vigorously until smooth. 🧀
Balls Falling Apart
If your balls crumble when forming or baking, the mixture likely needs more binding. Press the macaroni and cheese together firmly when scooping—wet your hands slightly to help the balls hold shape.
For extra structure, add 1 tablespoon of mayonnaise or extra cream cheese to the mixture. Bake at a lower temperature (350°F) to avoid overcooking the exterior before the interior sets. ✨
Uneven Browning
For perfectly golden balls, rotate the baking sheet halfway through baking to ensure even heat distribution. If some areas brown too quickly, tent the tray with foil for the last 5 minutes to prevent burning.
For extra crispiness, broil for 1-2 minutes at the end—but watch closely! Over-browning can dry out the filling. 🔥
Bacon Not Crispy Enough
If your bacon turns out soft instead of crispy, cook it longer at a lower temperature (around 275°F) for a slower render. Alternatively, bake the bacon on a wire rack at 400°F for 15-20 minutes for extra crunch.
Chopping the bacon smaller than ¼-inch also helps distribute flavor evenly in the balls. 🥓
Sticky Balls After Baking
If your balls stick to the parchment paper, your oven might be too hot or the mixture too wet. Next time, bake at 350°F and ensure your macaroni is well-drained before mixing.
For extra insurance, line your baking sheet with silicon baking mats or use a lightly greased parchment sheet. Let the balls cool for 5 minutes before transferring to a plate. 💫
Nutrition facts
Frequently asked questions
Can I make these mac and cheese balls ahead of time?
These taste even better the next day. Form and bake the balls as directed, then store them in an airtight container at room temperature for up to 2 days. For longer storage, freeze them (uncooked or baked) for up to 2 months. Reheat baked balls in the oven at 350°F for 10 minutes until crispy again.
What if I don't have panko breadcrumbs?
No problem! Use regular breadcrumbs or even crushed cornflakes for a lighter texture. For extra crispiness, mix in 1 tablespoon of melted butter with your breadcrumb coating. The key is to keep the coating dry—wet breadcrumbs will make the balls soggy.
Can I make these without cream cheese?
Yes, but the texture will be slightly different. Replace the cream cheese with 1 cup extra sharp cheddar plus 2 tablespoons milk to maintain creaminess. For a richer version, add 2 tablespoons sour cream to the sauce. The flavor will still be delicious—just slightly less velvety.
How do I make these vegan?
Swap the cheese for vegan cheddar and cream cheese alternatives, use vegan bacon, and replace butter with vegan butter. For binding, add 1 tablespoon nutritional yeast to the sauce. The texture will be slightly different but still satisfying—these work great as a party appetizer!
Why are my balls falling apart when baking?
This usually happens if the mixture is too dry or the balls aren't firm enough when formed. Wet your hands slightly when shaping the balls to help them hold together. For extra structure, add 1 tablespoon of mayonnaise to the macaroni mixture. Bake at 350°F instead of 375°F to prevent overcooking the exterior before the interior sets.