
Appetizers
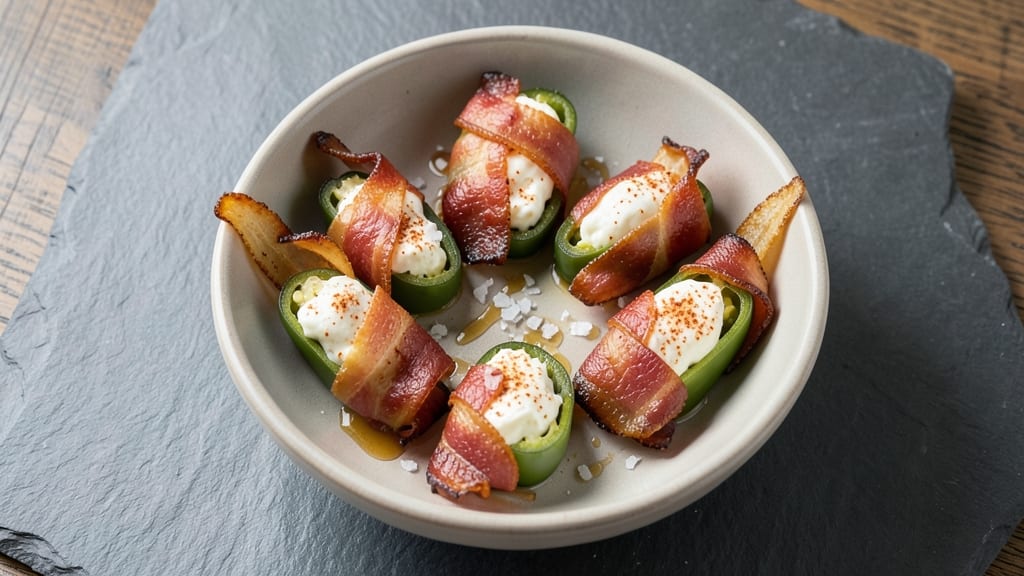
This bacon-wrapped cream cheese jalapeño poppers recipe delivers the ultimate crowd-pleasing appetizer—crispy bacon, creamy cheese, and fiery jalapeños all in one perfect bite. The secret lies in the balance of textures: tender jalapeños wrapped in gooey cream cheese, then encased in crispy bacon that crackles with every bite.
After testing countless variations, I’ve refined this method to ensure the filling stays melty while the bacon achieves that addictive crunch.
What sets these apart is the foolproof technique—stuffing the jalapeños just right, chilling the poppers before baking, and using a high enough temperature to render the bacon perfectly. The result?
A dish that’s impossible to resist, with every component playing its part: the heat from the jalapeños, the richness of the cream cheese, and the smoky depth of the bacon. No fancy equipment is needed—just a baking sheet and 25 minutes of hands-off time.
By the time they emerge from the oven, you’ll have golden, bubbling poppers with edges that are crispy enough to stand up to dipping—whether in ranch, blue cheese, or even a tangy slaw. The filling stays warm and gooey inside, creating that satisfying contrast with the crunchy exterior.
These are the kind of appetizers that disappear faster than you can say "second round," making them ideal for game day, parties, or just a cozy night in.
For extra indulgence, add a sprinkle of smoked paprika or a pinch of cayenne to the cream cheese mixture, or swap the jalapeños for poblanos if you prefer a milder kick.
Serve with a side of cool ranch or a crisp green salad to balance the richness. Let’s get cooking—these poppers are worth every calorie.
Ingredients for bacon wrapped cream cheese jalapeno popper
Twelve jalapeños, crispy bacon, and creamy cheese—this appetizer delivers crowd-pleasing magic every time.
| Ingredient | Amount | Notes |
|---|---|---|
| Large Jalapeño Peppers 🌶️ | 12 whole | Fresh, seeds removed for mild heat |
| Cream Cheese 🧀 | 16 oz | Full-fat, room temperature |
| Thick-Cut Bacon 🥓 | 12 slices | About 4 oz total, cut in half |
| Smoked Paprika 🌶️ | 1 tsp | For cream cheese mixture |
| Cayenne Pepper 🔥 | ¼ tsp | Adjust for desired heat |
| Salt 🧂 | ½ tsp | Kosher or sea salt |
| Black Pepper 🌶️ | ¼ tsp | Freshly ground |
| Cooking Spray 🫒 | 2 tbsp | Non-stick, for baking sheet |
| Toothpicks 🪥 | 24 whole | For securing bacon |
| Ranch Dressing 🥛 | ½ cup | For serving, optional |
| Blue Cheese Dressing 🧀 | ½ cup | For serving, optional |
The bacon makes or breaks these poppers. Thick-cut bacon from Costco or Trader Joe's gives the best crunch, but any quality brand works. Look for slices with good marbling—they render more flavor. For the jalapeños, fresh is a must—those jarred ones just don't cut it. Remove seeds for milder heat, but leave some for that signature kick. The cream cheese? Full-fat only—low-fat versions won't melt properly. I always buy the Philadelphia brand in 8 oz blocks for consistency, but any good-quality cream cheese will do.
No smoked paprika? Regular paprika at double the amount works in a pinch. Short on cayenne? Red pepper flakes at half the amount gives similar heat. The toothpicks are non-negotiable—regular wooden ones work best, but skewers or even folded aluminum foil can substitute if you're feeling fancy. For the dressings, store-bought ranch and blue cheese are fine, but homemade elevates everything. The cooking spray? Misto brand is my go-to—it sprays evenly and has no aftertaste. If you're feeling adventurous, try wrapping the poppers in bacon strips instead of halves for extra drama.
These poppers need to chill for 30 minutes before baking—don't skip this! They reheat beautifully, so make a double batch and freeze half. Store leftovers in an airtight container for up to 3 days. For parties, arrange them on a platter with the dressings in small bowls and watch them disappear. Pro tip: Bake at 425°F for 18-20 minutes—any lower and the bacon gets soggy. The filling stays melty inside while the bacon gets that perfect crispy edge.
Why You'll Love This Recipe
- No-Fuss Assembly: I swear by this recipe because it’s literally three steps: slice, stuff, bake. The jalapeños don’t even need seeding—just a quick rinse and they’re ready. That thick-cut bacon wraps itself around the peppers like a cozy blanket while you’re still debating what to watch on TV.
- Heat Meets Cream: Here’s what sold me—the smoky paprika and cayenne in the cream cheese mix cut through the pepper’s bite just enough to make it ridiculously good, not painful. The bacon’s crispy edges contrast that creamy, spicy center like a perfect push-and-pull. (Yes, even on a Tuesday night.)
- Party in a Bite: Between us, these are my go-to for game day, holiday appetizers, or when I’m too lazy to make a full meal. They disappear fast—even my kid who hates spicy food grabs them—and they reheat beautifully. Honestly, I’ve served them at everything from backyard BBQs to my own “I’m sick of salads” dinners.
- Budget-Friendly Crunch: Thick-cut bacon might sound fancy, but it stretches further than you’d think when you’re wrapping just one strip per pepper. Leftovers? Toss them in a container—they’re still crispy the next day, and I’ve even chopped them up for tacos. Not the prettiest, but the taste makes up for it every time.
Step-by-step instructions for bacon-wrapped cream cheese jalapeño poppers
Here's how to create perfectly crispy, spicy bites with melty cream cheese centers.
Prepare the Cream Cheese Filling
In a medium bowl, combine the 16 oz cream cheese with 1 tsp smoked paprika, 0.25 tsp cayenne pepper, 0.5 tsp salt, and 0.25 tsp black pepper. Use a hand mixer or fork to beat until completely smooth and creamy. This mixture should be thick but spreadable—if it's too firm, let it sit at room temperature for 5-10 minutes to soften.
Here's the thing—don't rush this step. The cream cheese needs to be fully incorporated to prevent any lumps in your poppers. If you notice any graininess, keep mixing until it disappears completely. The filling should be pale yellow with a slightly spicy aroma from the cayenne.
Stuff and Secure the Jalapeño Poppers
Cut each of the 12 whole large jalapeño peppers in half lengthwise, then carefully remove the seeds and membranes using a small spoon. This creates a hollow center perfect for stuffing. Be gentle—you don't want to tear the peppers.
Using a piping bag fitted with a small round tip (or a plastic bag with a corner snipped off), pipe about 1 tablespoon of the cream cheese mixture into each jalapeño half. Pack it firmly but don't overfill—you want room for the bacon to wrap snugly. Once stuffed, place each half on a plate and cover with plastic wrap until ready to assemble.
Wrap with Bacon and Secure
Cut each of the 12 slices thick-cut bacon in half crosswise, creating 24 bacon halves. Wrap one half around each stuffed jalapeño half, pressing gently to secure. Use 1 toothpick per popper to hold the bacon in place—insert it through the bacon and into the jalapeño at a slight angle.
Real talk: this is where precision matters. Make sure the bacon wraps completely around the jalapeño, leaving no gaps. If the bacon feels too loose, you can use a second toothpick for extra security. Arrange the poppers on a baking sheet lined with parchment paper, leaving 1 inch between each one for even cooking.
Bake Until Golden and Crispy
Preheat your oven to 400°F and lightly spray the poppers with 2 tbsp cooking spray (this helps the bacon crisp up beautifully). Bake for 20-25 minutes, flipping halfway through, until the bacon is deep golden brown and crispy, and the cream cheese is fully melted.
You'll know they're done when the bacon releases easily from the toothpick and has a perfect crunch. The jalapeños should be tender but still hold their shape. If the bacon isn't crispy enough after 25 minutes, return it to the oven for 2-3 minutes at 425°F for extra crispiness.
Serve with Cooling and Dressing
Remove the poppers from the oven and let them cool for 5 minutes before serving. This resting time allows the cream cheese to set slightly, making it easier to handle. Remove the toothpicks before serving—this prevents any accidental pokes while eating.
Serve immediately with the 0.5 cup ranch dressing or 0.5 cup blue cheese dressing on the side for dipping. The contrast of cool dressing with the warm, spicy poppers is what makes this dish truly special. Each bite should deliver a perfect balance of crispy bacon, creamy cheese, and a gentle jalapeño kick.
Pro Tips For Making Bacon Wrapped Cream Cheese Jalapeno Popper
- SCORE THE PEPPERS: Use a paring knife to make a shallow slit down one side of each jalapeño—just deep enough to slip in the cream cheese, but not so deep the filling leaks out when you wrap them. I learned this the hard way after watching my first batch ooze all over the pan like a sad, melted science experiment.
- CHILL THE CHEESE: Pop the cream cheese out of the tub and let it sit in the fridge for 10-15 minutes before mixing in spices. Room-temperature cream cheese spreads too easily, making those neat little log wraps impossible. Trust me, your future poppers will hold their shape better if you resist the urge to dive in immediately.
- WRAP TIGHT, NOT TOO TIGHT: Fold the bacon around the peppers with just enough overlap to seal the edges—think of it like wrapping a present, not strapping a bomb. Overly tight bacon won’t crisp properly, and too loose means the filling will escape during baking. Aim for snug, not suffocating.
- BAKE LOW AND SLOW: Skip the high-heat blitz and bake these at 375°F (190°C) for 20-25 minutes. I used to blast them at 400°F, and the bacon would burn before the cheese melted through. Low and steady gives you crispy bacon and gooey centers—no sad, undercooked surprises.
Essential equipment for perfect results
Baking Sheet Essentials
You’ll need a half-sheet baking pan (13x18 inches) for these poppers—it’s the perfect size for 12 pieces with room to breathe. I recommend Ozeri Springform pans with a non-stick coating for easy release, but any sturdy baking sheet works.
Line it with parchment paper or a silicon baking mat to prevent sticking and make cleanup a breeze. 💫
Toothpick Game-Changers
Standard wooden toothpicks are your best friend here, but skewer-style picks (like OXO Good Grips) work even better—they hold the bacon tighter and won’t bend. For extra security, use two toothpicks per popper if your bacon feels flimsy.
Pro tip: Soak toothpicks in water for 10 minutes before using to prevent burning in the oven.
Piping Bag Alternatives
No piping bag? No problem. Snip a small corner off a plastic freezer bag and squeeze the cream cheese directly into the jalapeños—it works just as well. For a smoother finish, use a spoon or butter knife to spread the filling evenly.
I’ve even seen chefs use pastry tips on a zip-top bag for precision, but a simple bag corner works fine for home cooks.
Cooking Spray Must-Haves
Misto brand or Pam non-stick spray are my go-tos—they coat evenly without leaving residue. Avoid olive oil spray, as it can make the bacon greasy instead of crispy. Lightly mist the poppers after arranging on the sheet (not before) to help the bacon brown beautifully. A small spray bottle works in a pinch, but dedicated cooking sprays give better control.
Oven Thermometer Check
Ovens lie! Use a Thermoworks oven thermometer to confirm your oven hits 400°F accurately—many run 25°F hotter or cooler than set. If your oven runs cold, bump the temp to 425°F for that perfect crisp.
I keep one permanently in my oven for all high-heat recipes—it’s a game-changer for consistency. 🌡️
Optional: Air Fryer Upgrade
Skip the oven entirely and use an air fryer for smaller batches—just arrange poppers in a single layer and cook at 375°F for 12-15 minutes, flipping halfway. A Ninja Foodi XXL handles 12 poppers easily, and the high heat gives bacon that same crispy magic.
For best results, preheat the air fryer for 3 minutes before adding the poppers.
Nutrition facts
Frequently asked questions
Can I use frozen jalapeños instead of fresh?
Fresh jalapeños are ideal for this recipe, but if you must use frozen, thaw them completely first and pat them very dry with paper towels. The moisture can make the bacon soggy, so extra drying is key. For best results, stick with fresh jalapeños—they hold their shape better during baking.
How do I make these less spicy?
Remove all seeds and membranes from the jalapeños before stuffing, and reduce the cayenne to 1/4 tsp or omit it entirely. For extra mildness, swap jalapeños for poblano peppers (remove seeds and membranes) and add 1/2 tsp sugar to the cream cheese mixture to balance flavors.
Why did my bacon get soggy instead of crispy?
Soggy bacon usually means the oven wasn't hot enough or the poppers weren't spaced properly. Preheat to 400°F for at least 10 minutes, leave 1 inch between poppers, and bake on the middle rack. For extra crispiness, broil for 1-2 minutes at the end (watch closely!).
Can I assemble these ahead of time?
Yes! Assemble the poppers (stuffed jalapeños + wrapped bacon) up to 24 hours ahead, cover tightly, and refrigerate. Bake straight from the fridge—just add 2-3 extra minutes to the cooking time. For freezing, assemble completely, freeze on a tray, then transfer to a bag for up to 1 month. Bake from frozen at 425°F for 25-30 minutes.
What's the best way to reheat leftovers?
Reheat in a 350°F oven for 8-10 minutes on a baking sheet to restore crispiness. For the air fryer, cook at 375°F for 4-5 minutes. Microwaving works in a pinch (30 seconds), but the bacon loses its crunch. Always reheat covered to prevent drying out.