
Breakfast & Brunch
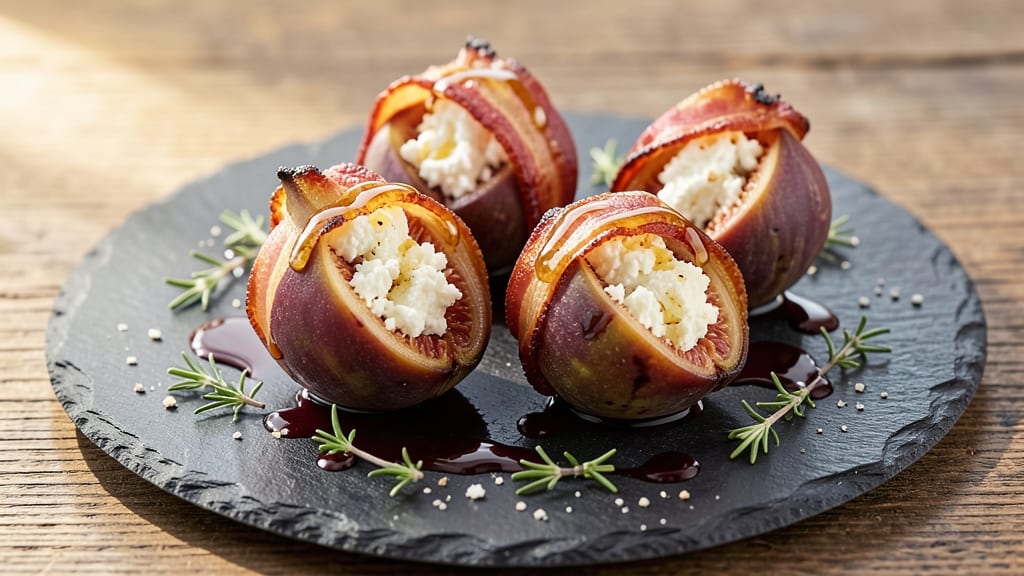
Bacon-wrapped figs with goat cheese transform a simple brunch into a showstopper—where sweet, salty, and creamy collide in every bite. This recipe delivers restaurant-worthy flavor in just 15 minutes, making it perfect for weekend mornings or elegant gatherings. The key is balancing the natural honeyed richness of figs with smoky bacon and tangy goat cheese, creating a bite that’s both indulgent and balanced.
The process is surprisingly simple: halved figs stuffed with goat cheese, wrapped in crispy bacon, and finished under the broiler for golden edges. No fancy equipment is needed—just a baking sheet and a few minutes of hands-on time.
The bacon renders its fat into the figs, infusing them with savory depth, while the goat cheese melts into creamy pockets that contrast beautifully with the caramelized exterior.
What you’ll end up with is a dish that’s equally at home on a charcuterie board or as the star of a brunch spread. The contrast of textures—creamy cheese, crispy bacon, tender figs—makes every bite satisfying.
Serve with a drizzle of balsamic reduction or a simple arugula salad to round out the meal.
This recipe is foolproof, but the secret lies in timing: broil just long enough for the bacon to crisp without burning, and let the figs soften slightly for the perfect texture. The result? A bite-sized masterpiece that’s worth every minute of prep.
Ingredients for bacon wrapped figs with goat cheese
Four fresh figs, crispy bacon, and creamy goat cheese create a brunch showstopper in minutes.
| Ingredient | Amount | Notes |
|---|---|---|
| Fresh Figs 🍇 | 4 whole | Medium-sized, stems trimmed |
| Goat Cheese 🧀 | 4 oz | Soft, crumbled style preferred |
| Thick-Cut Bacon 🥓 | 8 slices | Applewood smoked if available |
| Honey 🍯 | 1 tbsp | Wildflower for floral notes |
| Balsamic Glaze 🍷 | 2 tbsp | Reduced for intensity |
| Fresh Thyme Leaves 🌿 | 2 tsp | Chopped, for garnish |
| Extra-Virgin Olive Oil 🫒 | 1 tbsp | For drizzling |
| Diamond Crystal Kosher Salt 🧂 | ½ tsp | For seasoning |
| Freshly Ground Black Pepper 🌶️ | ¼ tsp | Lightly cracked |
| Arugula Leaves 🌱 | 1 cup | For serving (optional) |
The figs are the heart of this dish, so pick ripe but firm ones—they should yield slightly when pressed. Whole Foods or your local farmers market usually carry the best quality, but any grocery store will have them in season. Goat cheese makes all the difference here—look for brands like Capri or La Tourangelle for that perfect tangy creaminess. Bacon matters too: thick-cut slices crisp better and render more flavor. If you can't find applewood smoked, regular bacon still works—just expect a slightly milder flavor. The honey should be local wildflower if possible, but any good-quality honey will do.
No goat cheese? Substitute with herbed cream cheese—mix in a pinch of dried thyme and garlic powder for depth. Running short on bacon? Pancetta or prosciutto work beautifully as alternatives, though they'll have different textures. The balsamic glaze can be swapped for a drizzle of fig jam if you're in a pinch, though it won't have the same tangy kick. Fresh thyme is ideal, but dried thyme at one-third the amount works if you're out. For the arugula, any peppery green like watercress or spinach will do—just keep the leaves tender.
Store any unassembled ingredients in their original packaging: figs in the fridge for 3-4 days, goat cheese in an airtight container for 1 week, and bacon in the freezer for up to 6 months. Once assembled, these bite-sized treats keep for 2 days in the fridge—though they're best enjoyed fresh. Reheat in a 350°F oven for 5 minutes to restore crispiness. These make perfect make-ahead appetizers: assemble them the night before and broil just before serving.
Why You'll Love This Recipe
- Two-Handed Prep: I swear by this—just slice the figs, wrap the bacon, pop it in the oven. No chopping, no fuss, and honestly, that’s half the battle with weeknight cooking.
- Sweet-Savory Magic: The moment crispy bacon meets creamy goat cheese and that honey drizzle hits? It’s like a flavor explosion in your mouth. The balsamic glaze ties it all together—trust me, you’ll want to lick the plate.
- Weeknight or Party Star: Make a batch ahead for a charcuterie board, serve as an appetizer when friends drop by, or even toss a few on a salad for lunch. It’s that kind of recipe—versatile enough for any moment.
- Budget-Friendly Luxury: Thick-cut bacon and fresh figs might sound fancy, but you only need a handful for a satisfying bite. The goat cheese stretches, and the honey adds richness without breaking the bank. Fancy flavors, zero guilt.
Step-by-step instructions for bacon-wrapped figs with goat cheese
Transform simple ingredients into elegant appetizers with perfect balance and texture.
Prepare the Figs and Assemble the Wraps
Start by gently washing the 4 whole fresh figs and patting them completely dry with paper towels. I like to make a small slit on one side of each fig using a sharp paring knife—this creates a pocket for the goat cheese filling without tearing the fruit.
Crumble the 4 oz goat cheese into small, pea-sized pieces. Using your fingers, place 1 piece of crumbled goat cheese into each fig pocket, pressing it gently but firmly so it stays in place. The cheese should be visible through the slit but not bulging out.
Wrap with Bacon and Secure
Lay out the 8 slices of thick-cut bacon on a clean work surface. Place one fig (with cheese pocket) on top of each bacon slice, positioning it near one edge. Using your fingers, gently wrap the bacon around the fig, folding it over the top and tucking the ends underneath to fully encase the fruit.
Secure each wrap by placing a toothpick through the bacon and fig—this prevents unraveling during cooking. Arrange the wrapped figs on a parchment-lined baking sheet, leaving about 1 inch of space between each to allow for even cooking.
Bake Until Bacon is Crispy and Figs are Tender
Preheat your oven to 400°F. Once hot, bake the bacon-wrapped figs for 12-15 minutes until the bacon is deep golden brown and crispy, and the figs are tender when pierced gently with a fork. The cheese should be slightly melted but still hold its shape.
I check for doneness by lifting one fig—when the bacon releases easily and has a crisp texture, they're perfect. If the bacon isn't crispy enough after 15 minutes, return it to the oven for 2-3 minutes at a slightly higher temperature (425°F) for extra crispiness.
Drizzle and Garnish for Presentation
Remove the figs from the oven and let them cool for 2-3 minutes on the baking sheet. While they're cooling, combine the 1 tablespoon honey and 2 tablespoons balsamic glaze in a small bowl. Stir well to create a glossy drizzle.
Drizzle 1 teaspoon of the honey-balsamic mixture over each fig, allowing it to cascade down the sides. Sprinkle with the 2 teaspoons chopped fresh thyme leaves and a light dusting of 0.5 teaspoon Diamond Crystal kosher salt and 0.25 teaspoon freshly ground black pepper. The contrast of sweet, salty, and peppery flavors will elevate each bite.
Serve with Arugula for a Fresh Contrast
Arrange the 1 cup arugula leaves on a platter or individual plates. Place the bacon-wrapped figs on top of the arugula, allowing the greens to peek through for visual appeal. Drizzle each fig with an additional ½ teaspoon of the remaining honey-balsamic mixture just before serving.
Serve immediately while the bacon is still crispy and the figs are warm. The arugula adds a peppery freshness that cuts through the richness of the bacon and goat cheese, creating a perfect balance of textures and flavors.
Pro Tips For Making Bacon Wrapped Figs With Goat Cheese
- USE FIRM GOAT CHEESE: I learned this the hard way—soft goat cheese spreads like butter when wrapped in bacon, making a messy, uneven package. Grab a log-style or semi-firm variety (like Chèvre) and slice it into planks about ¼-inch thick—it holds shape and crisps beautifully without falling apart.
- WRAP BASTING SIDE DOWN: Bacon’s fat renders unevenly, so flip the slices fat-side out before wrapping. This guarantees the crispy, caramelized side faces outward while the fig and cheese stay snug against the meat’s leaner interior. Trust me, your figs won’t leak cheese everywhere.
- COOK LOW AND SLOW: Crank the oven to 350°F (not 400°F)—high heat turns bacon rubbery and dries out the figs. Bake for 18–20 minutes, checking at 15, until the bacon is golden and the cheese is just starting to melt. Patience here makes the difference between crisp and sad.
- DRIZZLE HONEY LAST: Adding honey too early turns it into a sticky mess that clings to the bacon instead of drizzling elegantly. Save it for the final 2 minutes of baking (or serve it separately) so it stays glossy and pools beautifully over the warm goat cheese. No one wants a honey-soaked bacon disaster.
Storing and reheating your bacon wrapped figs with goat cheese
Refrigerator Storage
Assembled bacon-wrapped figs keep beautifully in the fridge for up to 2 days if stored properly. Place them in a single layer on a parchment-lined plate, cover with plastic wrap, and refrigerate. The bacon stays crispier longer this way than if stacked in containers.
I like to keep them uncovered for 10 minutes after cooking to let excess moisture evaporate before sealing—this prevents sogginess. 🥗
Freezer Prep
For longer storage, freeze uncooked wrapped figs on a parchment-lined tray for 1 hour to set, then transfer to a ziplock freezer bag with parchment between layers. They'll keep for 2 months—thaw overnight in the fridge before cooking.
The bacon won't be as crispy after freezing, but the flavor remains delicious. I recommend cooking straight from frozen in a 425°F oven for 18-20 minutes to restore texture.
Reheating Crispiness
To revive crispy bacon after refrigeration, broil for 3-5 minutes on high heat. Place the figs on a baking sheet and watch closely—they'll crisp up beautifully. For oven reheating, bake at 350°F for 5-7 minutes.
I always add a fresh toothpick before reheating to secure any loose bacon. The figs should warm through while the bacon regains its satisfying crunch. 🔥
Make-Ahead Strategy
Assemble the figs with goat cheese and wrap them in bacon the night before, then refrigerate uncovered on a wire rack. This prevents condensation from making the bacon soggy. When ready to cook, simply broil for 12-15 minutes at 400°F.
The figs will be perfectly tender while the bacon crisps up beautifully. This is my go-to method for holiday brunches—it cuts prep time dramatically on the day of serving.
Garnish Refresh
After reheating, always refresh the garnishes—drizzle with fresh honey-balsamic mixture and sprinkle with chopped thyme. The contrast between warm, crispy bacon and cool, peppery arugula makes these bite-sized treats feel like a fresh creation every time.
I keep extra balsamic glaze in the fridge so I can quickly revive the dish with a glossy finish. The visual appeal is just as important as the taste!
Nutrition facts
Frequently asked questions
Can I use dried figs instead of fresh?
Fresh figs are ideal for this recipe because they hold their shape and texture beautifully when wrapped in bacon. Dried figs would absorb too much moisture and become mushy during cooking. If you must use dried figs, soak them in warm water for 10 minutes to rehydrate, then pat completely dry before wrapping—though the texture won't be as satisfying.
How do I get extra crispy bacon?
For maximum crispiness, use thick-cut bacon and bake at 425°F for the last 2-3 minutes of cooking. Place the wrapped figs on a wire rack over a baking sheet to allow air circulation underneath. If your bacon isn't crispy enough, try broiling for 1-2 minutes at the end, watching closely to prevent burning.
What if my goat cheese is too soft or melts too much?
Goat cheese varies in texture—if yours is very soft, chill it for 15-20 minutes before crumbling to help it hold its shape better. For extra stability, mix in 1 teaspoon cornstarch with the crumbled cheese before stuffing the figs. This creates a firmer filling that won't ooze out during cooking.
Can I make this ahead of time?
Assemble the figs with goat cheese and wrap them in bacon up to 24 hours ahead, then refrigerate uncovered on a wire rack. When ready to cook, broil for 12-15 minutes at 400°F. The figs will warm through while the bacon crisps beautifully. This is perfect for holiday brunches or parties!
What's the best way to serve these?
These bite-sized treats shine on a platter with arugula leaves underneath for contrast, or alongside a charcuterie board with nuts and dried fruit. For extra elegance, drizzle with balsamic reduction and sprinkle with cracked black pepper. They're equally delicious as a brunch appetizer or light dessert option.