
Appetizers
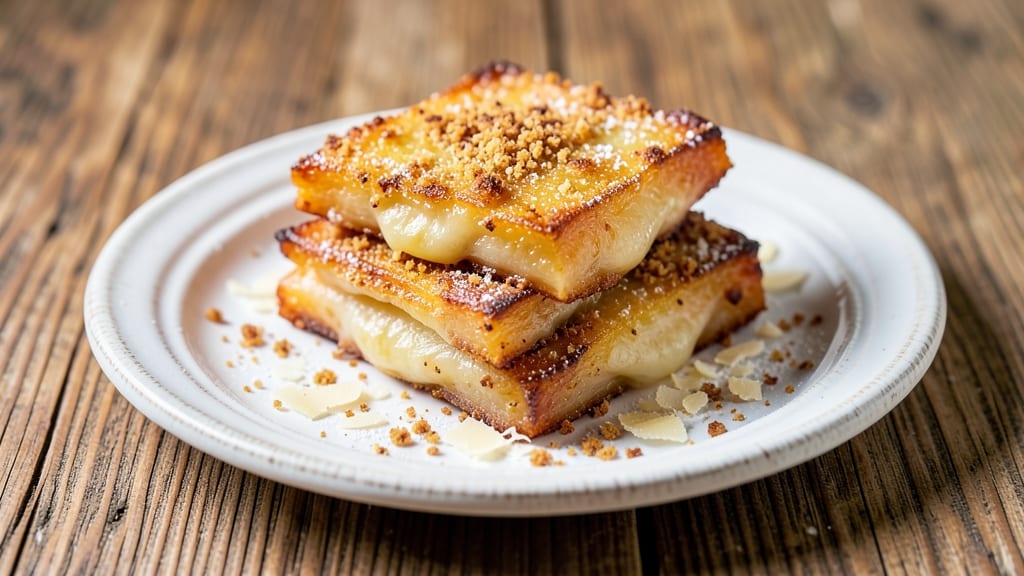
This baked cheese slices recipe delivers the perfect balance of crispy breaded edges and gooey melted centers that make every bite irresistible. 🔥 The secret lies in a simple breading technique and precise baking time—just 10 to 15 minutes at 375°F—to achieve that golden, crunchy exterior while keeping the inside perfectly creamy.
Whether you're serving these as an appetizer for game day or a snack for a movie night, they’re guaranteed to disappear quickly.
The process is straightforward but foolproof: start with your favorite cheese slices, coat them in a mix of flour, seasoned breadcrumbs, and a touch of parmesan for extra flavor. Bake until the edges are golden and the cheese is fully melted, creating a satisfying contrast with every bite.
The breading stays crispy even after cooling, making these slices perfect for dipping in marinara, ranch, or even honey mustard. What sets this recipe apart is how versatile it is—you can customize the breading with herbs, spices, or even crushed crackers for added texture.
The result is a dish that’s both comforting and impressive, with minimal effort required. Serve them warm with your favorite dipping sauce for the ultimate crowd-pleaser. This recipe is especially ideal for those who love crispy textures but still want that melty, cheesy satisfaction.
Perfect for parties, game days, or a quick snack, these baked cheese slices are a guaranteed hit. Let’s get started!
Ingredients for baked cheese slices
Crispy edges, melty centers—just 10 ingredients and 15 minutes for a crowd-pleasing snack!
| Ingredient | Amount | Notes |
|---|---|---|
| American Cheese Slices 🧀 | 12 whole | Single-serving size preferred |
| All-Purpose Flour 🌾 | ½ cup | For light dredging |
| Seasoned Breadcrumbs 🍞 | 1 ½ cups | Panko for extra crunch |
| Parmesan Cheese 🧀 | ¼ cup | Freshly grated, adds umami |
| Garlic Powder 🧄 | 1 tsp | For subtle garlic kick |
| Onion Powder 🧅 | 1 tsp | Balances flavors perfectly |
| Ground Black Pepper 🌶️ | ½ tsp | Freshly ground preferred |
| Olive Oil 🫒 | 1 tbsp | Light spray for crispiness |
| Egg 🥚 | 1 whole | Beaten for even coating |
| Dipping Sauce 🍅 | ½ cup | Marinara or ranch preferred |
The cheese is everything here—American slices (the single-serving kind) melt perfectly while holding their shape. Trader Joe's or Kroger always have the best selection of pre-sliced cheese, but any mild cheddar or mozzarella works in a pinch. Freshly grated Parmesan makes all the difference—store-bought pre-grated gets clumpy. For the breadcrumbs, Panko gives that perfect crunch, but regular seasoned breadcrumbs work too if that's what you've got. Pro tip: toast your breadcrumbs in a dry pan for 2-3 minutes before using—they'll stay crispier longer.
No Panko? Crushed crackers (like Ritz or saltines) add a fun twist—just pulse them in a food processor for 10 seconds. Short on Parmesan? Nutritional yeast gives a cheesy flavor without the cost. The egg wash is non-negotiable—it's what makes the breading stick like glue. If you're making these ahead, bake them straight from the fridge (just add 2-3 minutes to the time) so the breading doesn't soften. For extra flavor, add a pinch of smoked paprika to the breadcrumb mix—game-changer for a BBQ version!
These stay crispy for 24 hours if stored in an airtight container, but honestly? They're best fresh out of the oven. Freeze extras on a baking sheet first (so they don't stick), then transfer to a bag. Reheat in the oven at 350°F for 5-7 minutes—no microwave required. The dipping sauce is optional but highly recommended. Marinara for Italian vibes or ranch for a classic combo. Pro move: serve with a side of hot honey for a sweet-spicy twist that'll have everyone asking for seconds.
Why You'll Love This Recipe
- Five-Ingredient Magic: I swear by this recipe because it’s the kind of magic you can pull off with stuff already in your pantry. Flour, breadcrumbs, and a sprinkle of garlic powder turn plain American cheese into something crispy and golden—no fancy techniques required.
- Craving-Worthy Crunch: That buttery, breadcrumb crust meets the melty, gooey American cheese? It’s the kind of contrast that makes you reach for seconds. The Parmesan on top adds this little salty punch that ties it all together.
- Game for Any Meal: Need a quick snack? Toss them in a lunchbox. Hosting a game night? They disappear faster than chips. My college-aged kids grab these straight from the fridge—no fuss, just satisfaction.
- Budget-Friendly Leftovers: A single bag of American cheese and a box of breadcrumbs stretch this recipe way beyond one sitting. I’ve reheated these for days, and they still taste like they just came out of the oven. (Yes, even on a Tuesday night.)
Step-by-step instructions for crispy breaded cheese slices
Here's how to create golden, crunchy cheese slices with gooey centers—every bite is pure comfort!
👨🍳 Step 1: Prep the Cheese for Maximum Crispiness
Preheat your oven to 400°F and line a baking sheet with parchment paper. Arrange the 12 whole American Cheese Slices in a single layer, leaving about ½ inch between each slice. This spacing prevents them from sticking together during baking.
Here's the thing—American cheese melts differently than other cheeses. The key is to start with room-temperature slices. If they're straight from the fridge, let them sit at room temperature for 10 minutes before baking. Cold cheese won't melt evenly and will create uneven crispiness.
🍳 Step 2: Create the Perfect Breading Station
In a shallow bowl, whisk together the 0.5 cup All-Purpose Flour, 1 tsp Garlic Powder, 1 tsp Onion Powder, and 0.5 tsp Ground Black Pepper. In another bowl, beat the 1 whole Egg until just combined. In a third bowl, mix the 1.5 cups Seasoned Breadcrumbs with the 0.25 cup Parmesan Cheese.
I like to organize these in a triangle on my counter—flour mix at the top, egg in the middle, and breadcrumb mix at the bottom. This makes the breading process efficient. The Parmesan in the breadcrumbs adds that extra umami punch that makes these slices irresistible.
👨🍳 Step 3: Bread the Cheese Slices Evenly
Working with one slice at a time, lightly coat each side with the flour mixture, tapping off any excess. Then dip each slice into the beaten egg, letting any excess drip off. Finally, press each slice into the breadcrumb mixture, making sure both sides are fully coated.
Don't skip this step—it's what creates that perfect crunchy exterior. I press down gently on each slice to help the breadcrumbs adhere better. If you're making these for a crowd, work in batches so the breaded slices don't get soggy while you're working.
🔥 Step 4: Bake Until Golden and Melted
Lightly spray the breaded cheese slices with 1 tbsp Olive Oil (this helps with crispiness) and place them on the prepared baking sheet. Bake for 12-15 minutes until the edges are golden brown and the cheese is fully melted. You'll know they're perfect when the breading looks crispy and the cheese inside is gooey and stretchy.
Watch them closely after 10 minutes—ovens vary, and you want that beautiful golden color without burning. If any slices start browning too quickly, you can rotate the baking sheet for more even cooking. The cheese should be completely melted but not runny.
🍽️ Step 5: Serve with Your Favorite Dipping Sauce
Remove the cheese slices from the oven and let them cool for 2-3 minutes before serving. The breading will stay crispy if you don't let them sit too long. Arrange them on a serving platter and serve immediately with the 0.5 cup Dipping Sauce—marinara or ranch both work perfectly.
Here's where it gets fun—watch as everyone digs in. The contrast of crispy breading with that gooey melted cheese is what makes these so addictive. For extra presentation, sprinkle with additional Parmesan Cheese or a pinch of black pepper right before serving.
Pro Tips For Making Baked Cheese Slices
- Preheat Pan to Smoking Hot: I learned this the hard way—cold pans mean soggy breading. Slap that cheese slice in a skillet over medium-high heat for 30 seconds before transferring to the oven. The initial sear locks in flavor and prevents the breadcrumbs from turning into a sad, wet mess.
- Dry Your Cheese Slices: Pat each slice with a paper towel until they’re barely damp. Wet cheese = steam = breading that slides off like a bad taco. Take the extra 20 seconds—your crispy crust will thank you.
- Mix Breadcrumbs with Parmesan: Combine the breadcrumbs and Parmesan in a bowl before dredging. The cheese adds fat and flavor, so the crumb coating sticks better and doesn’t turn to dust. No need to overthink it—just toss them together like you’re seasoning fries.
- Bake Until Golden, Not Brown: Watch the color, not the clock. American cheese burns faster than you’d think. Pull them out when the edges are golden (about 10–12 minutes at 400°F), not when the crumbs turn dark. Overbaked = dry, underbaked = gummy.
Creative variations of this baked cheese slices
Spicy BBQ Twist
For a smoky, spicy kick, swap the breadcrumb mix for ½ cup crushed cornflakes and ½ cup seasoned breadcrumbs, then add 1 tbsp smoked paprika and 1 tsp cayenne pepper to the flour mixture.
Brush the baked slices with 2 tbsp BBQ sauce (like Sweet Baby Ray's) before serving. The cornflakes add a fun crunch, while the BBQ sauce ties everything together. 🌶️
Herb Garden Version
Infuse your breading with fresh herbs by mixing 1 tbsp dried oregano, 1 tbsp dried basil, and 1 tsp dried thyme into the breadcrumbs.
For extra flavor, add 2 tbsp finely chopped fresh parsley after baking. This Italian-inspired twist pairs perfectly with marinara sauce or a garlic aioli for dipping.
Cheesy Stuffed Surprise
Take these to the next level by stuffing each cheese slice with ¼ tsp garlic powder and ¼ tsp onion powder before breading. The spices bloom beautifully during baking, creating a flavor-packed surprise inside.
For a vegetarian twist, add a pinch of nutritional yeast to the breading for a cheesy depth without extra dairy.
Sweet & Savory Glazed
After baking, drizzle the warm cheese slices with a mix of 2 tbsp honey and 1 tbsp Dijon mustard, then sprinkle with crushed pecans for crunch. The sweetness balances the salty cheese perfectly, making these a hit at brunch or as a dessert-like appetizer.
Serve with a side of whipped cream for an unexpected twist.
Crunchy Cracker Crust
Replace breadcrumbs with 1 cup crushed saltine crackers for a nostalgic, buttery crunch. Boost flavor with 1 tsp garlic powder and ½ tsp smoked paprika in the flour mixture.
These taste like a cross between a cheese stick and a cracker—perfect for snacking or pairing with spicy ketchup or blue cheese dip.
Global Fusion Flavors
Try a Mediterranean twist by adding 1 tsp dried rosemary and ½ tsp dried oregano to the breadcrumbs, then drizzle with lemon zest after baking. For a Mexican-inspired version, mix ½ cup crushed tortilla chips into the breading and serve with salsa verde or queso dip.
The possibilities are endless! ✨
Nutrition facts
Frequently asked questions
Can I use any cheese for this recipe?
While American cheese works perfectly, you can also use mild cheddar, mozzarella, or even provolone slices. The key is choosing a cheese that melts smoothly without becoming greasy. Avoid pre-shredded cheese—it contains anti-caking agents that prevent proper melting. For extra flavor, try pepper jack or Gouda.
Why is my breading getting soggy? Soggy breading usually happens from excess moisture or undercooked slices.
How do I make these ahead of time?
Bake the cheese slices as directed, then let them cool completely. Store in an airtight container for up to 24 hours. To reheat, place them on a baking sheet and warm in a 350°F oven for 5-7 minutes until crispy again. For longer storage, freeze them on a tray first, then transfer to a bag for up to 1 month.
What's the best dipping sauce pairing?
Classic options include marinara or ranch, but don't be afraid to get creative! Try spicy ketchup, blue cheese dip, or even honey mustard for a sweet-savory combo. For a smoky flavor, mix BBQ sauce with a touch of hot sauce. The key is balancing the rich cheese with contrasting flavors.
Can I make these gluten-free?
Replace the flour with gluten-free all-purpose flour and use gluten-free breadcrumbs or crushed gluten-free crackers. For extra crispiness, add cornstarch to the flour mixture. The egg wash remains safe for most gluten-free diets, but check labels if you're avoiding eggs as well.