
Main Courses
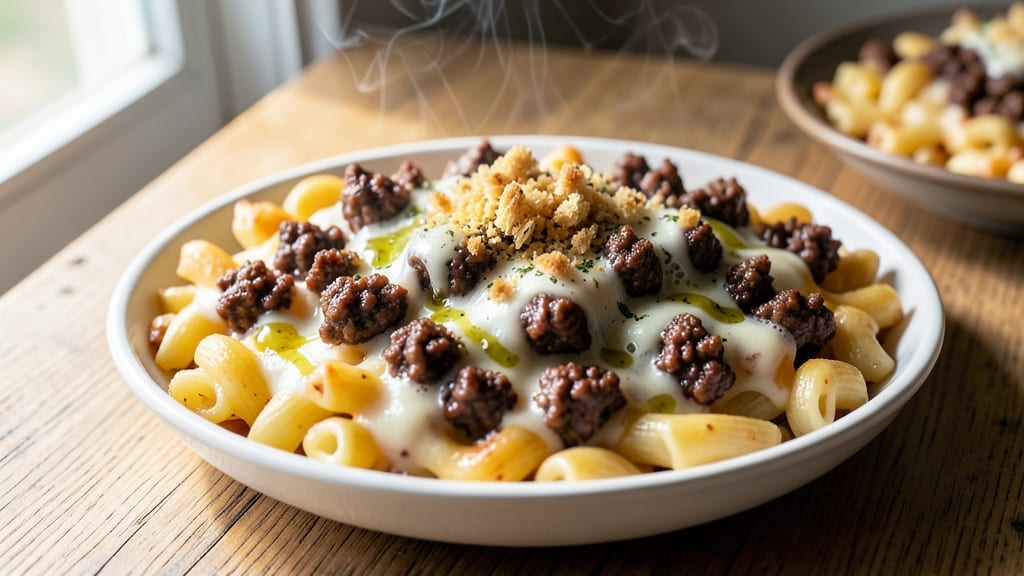
This baked mac and cheese with ground beef recipe delivers a hearty, one-pan dinner that combines creamy comfort food with savory protein in perfect harmony. The secret lies in browning the beef first—creating deep, rich flavors that infuse into the cheesy sauce as it bakes.
I developed this version after realizing how quickly mac and cheese could become a protein-packed main dish rather than just a side.
The beauty of this recipe is its simplicity: ground beef adds substance while the cheddar blend melts into a velvety sauce that coats every noodle. A crispy breadcrumb topping seals in moisture and adds satisfying texture.
What makes it stand out is the balance—no soggy bottoms, no overly greasy results, just a perfectly portioned meal that feeds a family of four in under an hour.
By the time it emerges from the oven, you’ll have golden-brown mac and cheese with tender beef chunks dispersed throughout, creating a dish that’s both indulgent and satisfying.
The aroma alone will have everyone gathering at the table. This is comfort food elevated—rich enough to feel special but easy enough for weeknights.
Serve with a simple side salad or steamed vegetables to round out the meal. The leftovers reheat beautifully, making it ideal for meal prep. Let’s get cooking with this foolproof, protein-packed classic.
Ingredients for baked mac and cheese with ground beef
Ground beef, cheddar, and elbow macaroni—simple ingredients that transform into a hearty one-pan dinner.
| Ingredient | Amount | Notes |
|---|---|---|
| Elbow Macaroni 🍝 | 12 oz | Medium or medium-large shape preferred |
| Ground Beef (80/20) 🥩 | 1 lb | Lean-to-fat ratio for juiciness |
| Sharp Cheddar Cheese 🧀 | 2 cups | Shredded, block preferred |
| Milk 🥛 | 2 cups | Whole milk for creaminess |
| Heavy Cream 🥛 | ½ cup | Full-fat for richness |
| All-Purpose Flour 🌾 | ¼ cup | For thickening sauce |
| Yellow Onion 🧅 | 1 whole | Diced, medium size |
| Garlic Cloves 🧄 | 3 cloves | Minced, fresh preferred |
| Butter 🧈 | ½ cup | Unsalted, cubed |
| Panko Breadcrumbs 🍞 | ½ cup | For crispy topping |
| Dried Mustard 🌶️ | 1 tsp | Adds depth of flavor |
| Ground Black Pepper 🌶️ | ½ tsp | Freshly ground preferred |
| Kosher Salt 🧂 | 1 tsp | Adjust to taste |
| Olive Oil 🫒 | 1 tbsp | For browning beef |
The ground beef is where flavor starts. 80/20 fat ratio keeps it juicy—Trader Joe's or Costco usually carry pre-packaged 1-lb bags for convenience. Look for bright red color and avoid any with grayish tones. The sharp chedddar makes all the difference—Kraft 2-year aged or Cabot are reliable brands. If you can't find block cheese, pre-shredded works, but add a pinch of cornstarch to prevent clumping. For the pasta, Barilla or De Cecco are my go-tos—they hold up better during baking than some store brands.
No sharp chedddar? Colby Jack or Monterey Jack blend well, though the flavor won't be as bold. Running short on heavy cream? Whole milk plus 2 tbsp butter works in a pinch. The panko breadcrumbs should be dry—moisten them slightly if they seem too fine. For extra depth, add 1/2 tsp smoked paprika to the breadcrumb mix. The dried mustard is non-negotiable—it cuts through the richness beautifully. If you've got Dijon mustard, use 1/2 tsp instead. The garlic can be pre-minced from a jar, but fresh is always better if you've got time.
This dish reheats beautifully—3-5 minutes at 350°F until bubbly. Portion into glass baking dishes for easy storage. Keeps 4-5 days in the fridge, though I rarely have leftovers that long. For meal prep, assemble the dish one day ahead, cover tightly, and bake straight from the fridge—just add 5-10 minutes to the cooking time. The breadcrumb topping stays crispy for 2 days if stored properly. Freeze portions for up to 3 months—thaw overnight in the fridge before reheating.
Why You'll Love This Recipe
- One-Pan Magic: I swear by this recipe because it’s the only mac and cheese I’ll ever make again—just one sheet pan, no extra bowls, and that rich, meaty sauce clings to the noodles like it’s been there forever. The ground beef cooks right in the same dish, so no extra pots to scrub.
- Cheese Pulls No Punches: That sharp cheddar? It’s the star. When it melts into a glossy, stretchy blanket over the beef and pasta, you’ll forget about those sad, dry casseroles from the past. Honestly, the first time I tasted it, I nearly dropped my fork.
- Leftover Hero: This dish actually tastes better the next day. The beef stays juicy, the cheese gets even gooier, and the crispy top? Still perfect for reheating. I make a double batch on Sundays because it’s my go-to for lazy nights or when I need to feed a crowd without stress.
- Budget Win: Ground beef and elbow macaroni are cheap staples, but they add up to something that feels fancy. Between us, I’ve fed four people for under $10, and no one ever guesses it’s not a restaurant dish. The heavy cream and milk make it feel indulgent without breaking the bank.
Step-by-step instructions for baked mac and cheese with ground beef
This one-pan method delivers a rich, hearty dinner with tender beef and perfectly melted cheese.
Cook the Elbow Macaroni Al Dente
Bring a large pot of water to a rolling boil and add 12 oz elbow macaroni. Cook according to package directions until 1 minute before al dente—you want it slightly undercooked so it absorbs the sauce fully in the oven. Drain in a colander, reserving ½ cup pasta water for later.
Real talk: Don't rinse the pasta. The starch on the noodles helps create a thicker, creamier sauce. Return the drained pasta to the pot and set aside, covered, while you prepare the beef mixture. The residual heat keeps it warm without overcooking.
Brown the Ground Beef and Sauté Aromatics
Heat 1 tablespoon olive oil in a large oven-safe skillet over medium-high heat. Add the 1 lb ground beef (80/20) and cook, breaking it apart with a wooden spoon, until no longer pink and the fat has rendered out. This should take about 5-6 minutes—don't rush it, or the beef will steam instead of brown.
Once the beef is cooked, drain excess fat if needed (about 1-2 tablespoons should remain for flavor). Add the diced yellow onion and cook for 3 minutes until softened. Stir in the minced garlic cloves and cook for another 30 seconds until fragrant. You're building flavor here—don't skip this step.
Make the Creamy Cheese Sauce
Lower the heat to medium and add ½ cup butter to the skillet. Let it melt completely, then whisk in the ¼ cup all-purpose flour to create a roux. Cook for 1 minute until the flour loses its raw taste.
Gradually whisk in the 2 cups milk and ½ cup heavy cream, ensuring no lumps form. Stir constantly until the mixture thickens to a creamy consistency—about 3-4 minutes. Remove from heat and stir in 2 cups sharp cheddar cheese, 1 teaspoon dried mustard, ½ teaspoon ground black pepper, and 1 teaspoon kosher salt until fully melted and smooth.
Combine and Bake to Perfection
Return the skillet to medium-low heat and add the cooked elbow macaroni along with the reserved ½ cup pasta water. Stir gently to coat the noodles evenly with the cheese sauce. If the mixture seems too thick, add 1-2 tablespoons more pasta water to reach your desired consistency.
Transfer the skillet to a 375°F preheated oven. Bake uncovered for 15 minutes to let the cheese fully melt and the macaroni absorb the sauce. Watch for the edges to turn lightly golden brown—this indicates the cheese is beginning to set.
Add Crispy Topping and Finish
Remove the skillet from the oven and sprinkle the ½ cup panko breadcrumbs evenly over the top. Return to the oven for an additional 3-5 minutes until the breadcrumbs turn golden brown and crispy. This topping adds texture contrast that balances the creamy macaroni.
Let the mac and cheese rest for 5 minutes before serving. This resting time allows the cheese to set slightly, making it easier to scoop. The crispy breadcrumb topping should hold its shape, while the interior remains creamy and rich. Serve immediately with a side of steamed vegetables or a simple green salad for a complete meal.
Pro Tips For Making Baked Mac And Cheese With Ground Beef
- CRISP THE BEEF FIRST: Brown the ground beef until it’s deep brown, not just pink—this builds flavor that cuts through the richness of the cheese sauce. I used to skip this step and wondered why my dish tasted like "meat-flavored mac and cheese" instead of a hearty, savory bite. (Yes, even if you're impatient like me.)
- DRAIN MACARONI WELL: After boiling, drain the pasta completely and give it a solid 30-second shake in the colander—starchy water makes the sauce gluey and watery. I learned this the hard way after serving a batch that looked like soup instead of baked mac.
- SALT THE CHEESE MIX: Taste the cheese sauce before baking and add another pinch of salt—sharp cheddar can be finicky, and the heavy cream dulls the flavor. My grandmother swore by this, and she was right: the difference between "good" and "outstanding" often comes down to seasoning.
- BAKE COVERED THEN UNCOVERED: Start baking with foil on for 15 minutes to melt the cheese evenly, then remove it for the last 5-10 minutes to get that golden crust. This isn’t the prettiest method, but it’s the tastiest—no soggy top or undercooked center.
Serving suggestions for leftovers
Crispy Topping Variations
Skip the panko and try crushed cornflakes for a lighter texture or seasoned breadcrumbs with 1 tsp smoked paprika and ½ tsp garlic powder for extra depth. For a cheesy crunch, sprinkle ½ cup grated Parmesan mixed with the breadcrumbs.
My go-to shortcut? Use Ritz cracker crumbs—they stay crispy longer than panko and add a subtle sweetness that balances the richness. 🍞
Side Salad Pairings
A simple arugula salad with lemon vinaigrette cuts through the richness perfectly. Toss 4 cups baby arugula with 2 tbsp olive oil, 1 tbsp fresh lemon juice, and a pinch of kosher salt.
For something heartier, try shredded cabbage and carrot slaw with a honey-mustard dressing. I always keep a pre-washed bag of spring mix on hand for quick assembly. 🥗
Bread Service Ideas
Serve with crusty French bread or garlic bread for dipping—just brush slices with melted butter and sprinkle with garlic powder. For a fun twist, offer soft dinner rolls with herb butter on the side.
Pro tip: Warm the bread in a 350°F oven for 5 minutes before serving to enhance flavor. 🍞
Vegetable Add-Ins
Stir in 1 cup steamed broccoli florets or diced bell peppers when combining the macaroni and sauce. For a smoky touch, add ½ cup diced smoked gouda along with the sharp cheddar. Roasted zucchini or mushrooms (sautéed with the onions) add earthy notes that complement the beef. 🌱
Dessert Pairings
End the meal with warm apple crisp or chocolate chip cookies—both pair beautifully with the savory richness. For something lighter, offer vanilla ice cream with a drizzle of caramel sauce. I love serving mini chocolate pudding cups alongside for a nostalgic touch. 🍫
Make-Ahead Serving
Assemble the dish one day ahead and refrigerate uncovered. Before baking, add 5-10 extra minutes to the oven time to crisp the topping. For potlucks, transfer to a ceramic baking dish (like Pyrex) for easy transport. Cover loosely with foil while traveling to keep it warm. 📅
Nutrition facts
Frequently asked questions
Can I use ground turkey instead of beef?
Ground turkey works beautifully—just use 1 lb with the same fat ratio (80/20 or lean-to-fat blend). For extra flavor, add 1/2 teaspoon smoked paprika to the turkey while browning. The cooking time remains the same, but turkey may release slightly less fat, so you might want to add 1 tablespoon olive oil to the skillet.
Why did my mac and cheese turn out greasy?
Greasy results usually happen when too much fat remains from the beef or butter. Drain excess fat after browning the beef (leave about 1-2 tablespoons for flavor), and use the full 2 cups milk + 1/2 cup heavy cream to balance richness. For extra insurance, chill the assembled dish for 30 minutes before baking—this helps the cheese set properly.
How can I make this dish kid-friendly?
For picky eaters, stir in 1/2 cup finely chopped steamed carrots or diced sweet potatoes when combining the macaroni and sauce. Cut portions into fun shapes with a cookie cutter, or serve with mild marinara sauce on the side for dipping. Kids love the crispy breadcrumb topping—it makes the dish feel special!
What's the best way to reheat leftovers?
Reheat in a 350°F oven for 10-15 minutes covered with foil until bubbly, then uncover for the last 2-3 minutes to crisp the topping. Microwave reheating works too—cover with a damp paper towel and heat in 30-second intervals, stirring between each. The breadcrumb topping may soften slightly but stays delicious.
Can I make this in a slow cooker?
Yes! Cook the beef and aromatics as directed, then transfer everything (including pasta) to a 3-4 quart slow cooker. Cover and cook on LOW for 2-3 hours, stirring occasionally. For the crispy topping, sprinkle breadcrumbs on top and broil for 2-3 minutes at the end. The texture will be creamier but still hearty.