
Salads
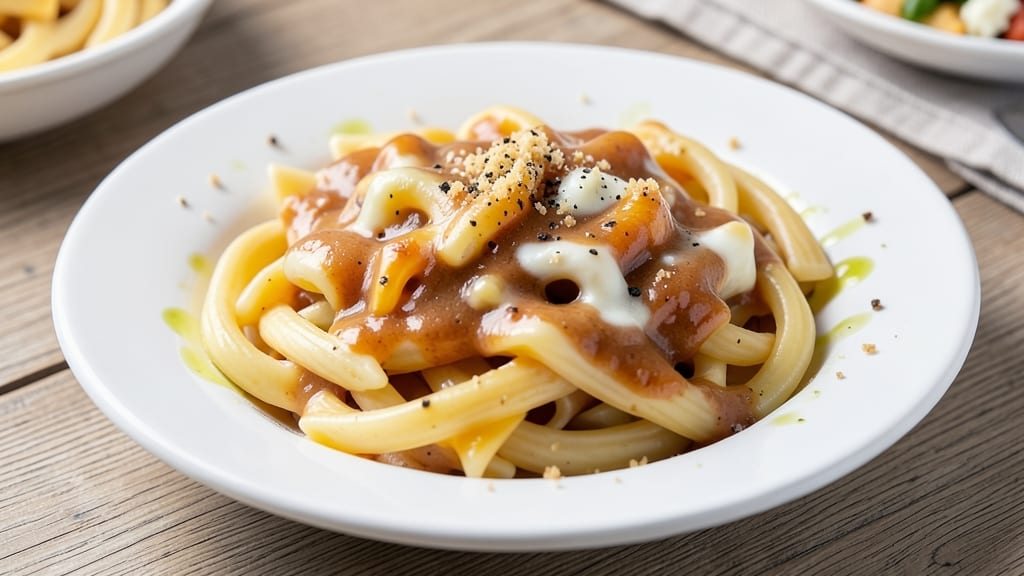
Barilla pasta mac and cheese transforms a simple weeknight dinner into a restaurant-worthy dish with its crispy, golden top and velvety cheese sauce. The secret lies in using Barilla's al dente texture—it holds up perfectly to the rich, creamy sauce without turning mushy. This one-pan recipe combines the comfort of classic mac and cheese with a foolproof technique that delivers crispy edges and a sauce so rich it coats every noodle.
The foundation starts with a roux made from butter and flour, which creates a stable base for the cheese sauce. Sharp cheddar provides the signature tang, while Gruyère adds depth and creaminess. Barilla's slightly firmer texture ensures the pasta maintains its shape, making every bite satisfying.
The crispy breadcrumb topping isn’t just for looks—it adds a delightful crunch that contrasts beautifully with the soft, cheesy layers below.
What you’ll end up with is a golden, bubbling mac and cheese that’s crispy on top, creamy in the middle, and packed with flavor. The sauce clings to the pasta, creating pockets of cheesy goodness in every forkful.
This recipe is designed to impress without requiring advanced skills—just a few simple steps and a little patience for the perfect texture.
Serve it as a main dish for family dinners or a side for holiday gatherings. The leftovers reheat beautifully, making it a great meal prep option too. Here’s how to make it—easy, foolproof, and absolutely delicious.
Ingredients for barilla pasta mac and cheese
Pantry staples plus a few specialty cheeses for that restaurant-worthy texture.
| Ingredient | Amount | Notes |
|---|---|---|
| Barilla Pasta 🍝 | 12 oz | Elbow shape preferred |
| Unsalted Butter 🧈 | ½ cup | Cold, cubed for roux |
| All-Purpose Flour 🌾 | ½ cup | For smooth roux |
| Sharp Cheddar Cheese 🧀 | 2 cups | Shredded, block preferred |
| Gruyère Cheese 🧀 | 1 cup | Shredded, adds depth |
| Whole Milk 🥛 | 1 ½ cups | Warm for smooth sauce |
| Yellow Onion 🧅 | 1 whole | Diced, medium size |
| Garlic Cloves 🧄 | 3 cloves | Minced, fresh preferred |
| Panko Breadcrumbs 🍞 | ½ cup | For crispy topping |
| Dried Parsley 🌿 | 1 tbsp | For garnish |
| Salt 🧂 | 1 ½ tsp | Adjust to taste |
| Ground Black Pepper 🌶️ | ½ tsp | Freshly ground |
| Extra-Virgin Olive Oil 🫒 | 1 tbsp | For crispy topping |
The Barilla pasta is non-negotiable here—its al dente texture holds up perfectly to the rich sauce. Whole wheat Barilla works too, but the classic white gives that signature creamy bite. For the cheeses, sharp cheddar is your flavor anchor, while Gruyère adds that luxurious melt. I grab mine from Whole Foods or Kroger's deli counter, where they shred it fresh. The butter should be cold when making the roux—this prevents the sauce from breaking. If you're in a rush, Land O'Lakes unsalted is my go-to brand.
No Gruyère? Swiss cheese works in a pinch—it's milder but still melts beautifully. Fresh out of parsley? Dried parsley at one-third the amount gets you close, though fresh has that pop. The panko topping is key for crispiness—Trader Joe's has the best quality at a great price. For the roux, don't rush it—cook it until it's a deep golden brown for that nutty flavor. The onion and garlic should be finely diced, almost paste-like, so they disappear into the sauce. Pre-shredded cheese? Skip it—it's full of anti-caking agents that make the sauce grainy.
This reheats beautifully—just cover with foil and warm in the oven for 10-15 minutes. Keeps for 4-5 days in the fridge, though I rarely have leftovers that long. For meal prep, assemble it in a baking dish, refrigerate, then bake straight from cold for 25-30 minutes. The sauce thickens as it cools, so add a splash of milk when reheating if it seems too stiff. Portion into individual dishes for easy grab-and-go lunches—just pop them in the microwave for 2 minutes.
Why You'll Love This Recipe
- One-Pot Magic: I swear by this method—just melt butter, whisk in flour, add milk (or broth), then toss in shredded cheddar and Gruyère while the Barilla pasta cooks. No extra pots, no fuss, and the cheese melts into that perfect, stretchy sauce without a lump in sight.
- Cheese Love Bomb: That combo of sharp cheddar and nutty Gruyère? It’s a flavor explosion. The Gruyère adds depth, while the cheddar keeps it bold—every bite has that creamy, cheesy pull that makes you reach for seconds.
- Weeknight Hero: Between us, this is my go-to when I’m tired but still want something impressive. It’s ready in 25 minutes, feeds the whole family, and even my picky-eating teenager clears his plate. (Yes, even on a Tuesday night.)
- Budget Win: Barilla pasta and basic cheeses stretch far, and the leftovers? They reheat like a dream. I make a double batch on Sundays—half for dinner, half for lunches all week—and no one complains about the taste.
Step-by-step instructions for crispy-topped Barilla mac and cheese
Here's how to create a velvety, cheesy pasta with a golden, crunchy breadcrumb topping that stays crispy until the last bite.
Cook the Pasta and Prepare the Roux
Start by boiling a large pot of salted water (it should taste like the sea) and cook the 12 oz Barilla Pasta until 1 minute before it reaches al dente. Reserve 1 cup of the starchy pasta water before draining—this liquid is essential for creating a smooth sauce.
While the pasta cooks, melt the 0.5 cup Unsalted Butter in a large, heavy-bottomed pot over medium heat. Add the 0.5 cup All-Purpose Flour all at once and whisk constantly for 2-3 minutes until the mixture turns a pale golden color. This is your roux—the foundation of a silky sauce. If it darkens too quickly, reduce the heat slightly to prevent burning.
Build the Cheese Sauce
Slowly pour in the 1.5 cups Whole Milk while whisking vigorously to prevent lumps from forming. Continue whisking for 3-4 minutes until the mixture thickens enough to coat the back of a spoon. This step is critical—don't rush it, or you'll end up with a grainy sauce.
Reduce the heat to low and gradually add the 2 cups Sharp Cheddar Cheese and 1 cup Gruyère Cheese, stirring constantly until fully melted and smooth. The sauce should be thick but still pourable. If it's too thick, add 2-3 tablespoons of the reserved pasta water to reach your desired consistency. Season with 1.5 tsp Salt and 0.5 tsp Ground Black Pepper, then set aside.
Sauté Aromatics and Combine
In a separate skillet, heat 1 tbsp Extra-Virgin Olive Oil over medium heat. Add the diced Yellow Onion and cook for 5 minutes until softened but not browned. Add the 3 minced Garlic Cloves and cook for another 30 seconds until fragrant. Transfer the onion and garlic to the cheese sauce.
Drain the pasta and immediately add it to the cheese sauce. Stir gently to coat each strand evenly. The residual heat will finish cooking the pasta while absorbing the rich sauce. If the mixture seems too thick, add more reserved pasta water 1 tablespoon at a time until it reaches a creamy, clingy consistency.
Assemble and Bake for Crispy Topping
Preheat your oven to 375°F. Transfer the pasta mixture to a greased 9x13-inch baking dish and spread it evenly. In a small bowl, mix the 0.5 cup Panko Breadcrumbs with 1 tbsp Dried Parsley and 1 tbsp Extra-Virgin Olive Oil. Sprinkle this mixture evenly over the top of the mac and cheese, pressing down gently to ensure even coverage.
Bake for 15-20 minutes until the top is deep golden brown and the edges bubble slightly. The breadcrumb topping should be crispy enough to hold its shape when you run a knife through it. If it browns too quickly, tent the dish with foil to prevent burning while the center finishes cooking.
Rest and Serve
Remove the dish from the oven and let it rest for 5 minutes before serving. This resting period allows the cheese to set slightly, making it easier to slice and preventing a runny mess. The crispy breadcrumb topping will stay crunchy if you serve it immediately, but the pasta will hold its shape better after a brief rest.
Cut into squares and serve with a side of garlic bread or a simple green salad. The contrast of the creamy, cheesy pasta with the crispy, herby breadcrumb topping makes every bite irresistible. Store leftovers covered in the refrigerator for up to 3 days, though I doubt they'll last that long!
Pro Tips For Making Barilla Pasta Mac And Cheese
- Cook Pasta Al Dente: Barilla’s firm texture holds up better when slightly undercooked—aim for a bite with a tiny white center. Overcooking turns it mushy, and you’ll end up with a gluey mess instead of a creamy, cheesy bite. Trust the timer, then taste-test before draining.
- Melt Cheese Slowly: Start with sharp cheddar and Gruyère in equal parts, but add the cheddar first—it’s more aggressive and burns easier. Once it’s fully melted and smooth, stir in the Gruyère for that nutty depth without risking graininess. Low heat is your friend here.
- Skip the Lumpy Roux: Whisk your butter and flour into a pale gold paste before adding liquid—this isn’t the time for browned bits. If you rush it, you’ll end up with flour clumps that turn to gritty lumps in your sauce. Take the extra 30 seconds; your future self will notice.
- Reserve Starchy Water: Before draining, scoop out a half-cup of pasta water—it’s liquid gold for adjusting consistency. If your sauce thickens too much, a splash of starchy water smooths it out instantly. No need to start over; just add a little at a time.
Essential equipment for barilla pasta mac and cheese
Heavy-Bottomed Pot
The large, heavy-bottomed pot is non-negotiable for this recipe. I use my All-Clad 5-quart Dutch oven—it distributes heat evenly and prevents scorching when making the roux. A stainless steel pot works too, but avoid nonstick—it can't handle the high heat needed for a proper roux.
The pot should have enough capacity for the sauce to bubble gently without overflowing. 🔥
Whisk for Smooth Sauce
A balloon whisk is essential for creating a lump-free cheese sauce. My go-to is a OXO Good Grips whisk—it's sturdy and cleans up easily. Whisking vigorously while adding milk to the roux prevents clumps that can ruin your sauce.
If you don't have a whisk, a hand mixer works in a pinch, but whisking by hand gives you more control over the sauce's texture.
Baking Dish Essentials
Use a 9x13-inch baking dish for even baking and easy serving. I prefer ceramic-coated metal dishes because they conduct heat well and prevent sticking. A glass dish works too, but it may take slightly longer to brown.
Grease the dish thoroughly with butter or olive oil to ensure the mac and cheese slides out cleanly. Avoid dark-colored dishes—they can make the mac and cheese look overcooked before it's ready.
Pasta Strainer
A wide-mouth colander with large holes is a game-changer for draining pasta. I use a OXO Good Grips pasta server—it drains pasta quickly and has a built-in strainer to catch any stray noodles. Reserve that 1 cup of starchy pasta water in a separate bowl before draining.
This liquid is your secret weapon for adjusting the sauce's consistency later. Never skip this step—it's what makes the sauce silky smooth. 💫
Measuring Tools
Precision matters in this recipe, so invest in a stainless steel measuring cups and spoons. My OXO Good Grips set has clear markings and stays accurate even with wet ingredients. For the roux, measure your butter and flour in equal parts by weight if possible—this ensures a balanced flavor.
A digital kitchen scale is ideal, but volume measurements work fine for home cooks. Always level off dry ingredients with a straight edge for accuracy.
Breadcrumbs and Garnish Tools
A small mixing bowl and a fine-mesh sieve help create the perfect crispy topping. Mix your panko breadcrumbs with olive oil and parsley in the bowl, then sprinkle evenly over the mac and cheese. The sieve ensures your dried parsley is evenly distributed without clumps.
For extra crispiness, press the breadcrumb mixture gently with the back of a spoon to create an even layer. A pastry brush also works for spreading any remaining oil evenly.
Nutrition facts
Frequently asked questions
Can I use whole wheat Barilla pasta instead of regular?
Yes, but expect a slightly denser texture that absorbs sauce differently. Use 1-2 extra tablespoons of milk in the sauce to compensate for the extra moisture in whole wheat pasta. The flavor will be nuttier, but the creamy consistency may be slightly lighter.
What if my cheese sauce gets too thick?
Don't panic! Add the reserved pasta water 1 tablespoon at a time while stirring constantly. The sauce should be thick enough to coat the back of a spoon but still pour smoothly. If you didn't reserve pasta water, a splash of warm milk works in a pinch.
Can I make this mac and cheese ahead of time?
Assemble the dish in the baking pan, cover tightly, and refrigerate for up to 24 hours. When ready to bake, add 5-10 minutes to your baking time (around 25-30 minutes total) since it starts cold. The sauce will thicken as it reheats, so add a splash of milk if needed.
Why did my breadcrumb topping get soggy?
This usually happens if the mac and cheese wasn't fully baked or if the breadcrumbs weren't pressed down firmly. For crispy results, bake until the center reaches 165°F and press the topping gently with a spoon before baking. Another trick: broil for 1-2 minutes at the end for extra crispiness.
What's the best way to add protein to this recipe?
Try crispy bacon, diced ham, or shredded rotisserie chicken mixed into the sauce. For extra richness, fold in 1 cup cooked chicken or ½ cup crumbled bacon after the pasta is combined. If adding meat, reduce the milk by 2 tablespoons to maintain the sauce's consistency.