
Main Courses
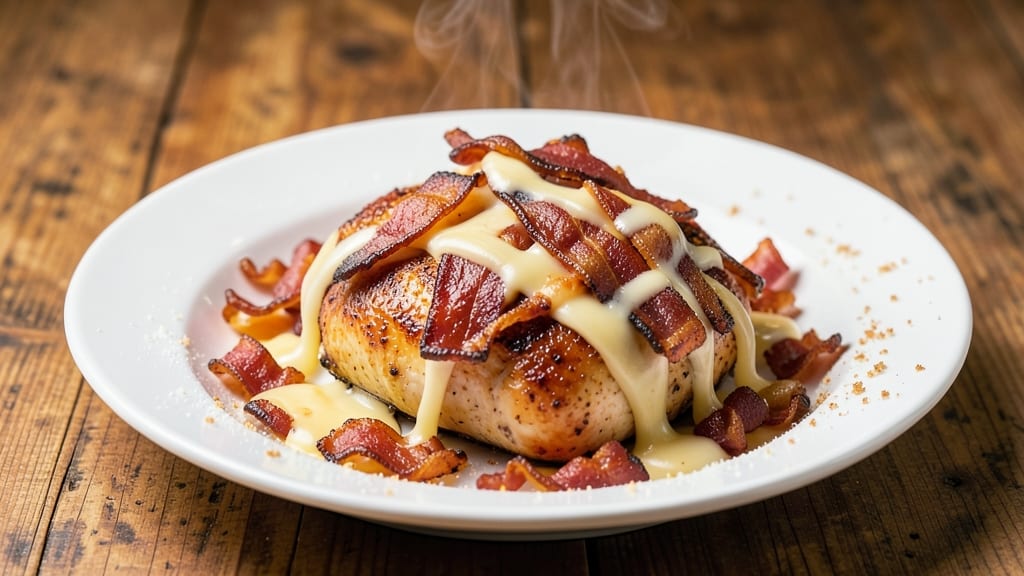
This baked chicken with bacon and cheese delivers the perfect balance of textures—crispy bacon edges, smoky depth, and melty cheese streaks that make every bite irresistible. 🔥 I developed this recipe after years of experimenting with ways to elevate simple baked chicken, and the combination of bacon and cheese transforms an ordinary dish into something restaurant-worthy.
The secret lies in layering the bacon and cheese just right so they create a golden, crackling crust while keeping the chicken juicy inside.
The technique is straightforward but yields impressive results: boneless chicken breasts are coated in a savory blend of spices, topped with crispy bacon and a layer of sharp cheddar and mozzarella.
Baking at 375°F ensures the chicken cooks through evenly while the bacon gets perfectly crispy and the cheese melts into gooey perfection. This method works for weeknight dinners or special occasions—no one will guess it's not from a high-end restaurant.
What you'll end up with is a dish that's visually stunning and packed with flavor—golden-brown bacon pieces, melted cheese pulling slightly at the edges, and chicken that's tender all the way through.
The smoky, salty bacon pairs beautifully with the sharp, creamy cheese, creating a flavor profile that's both comforting and exciting. Serve it with roasted vegetables or a fresh salad to round out the meal.
This recipe is designed to be foolproof, with simple ingredients and a method that delivers consistent results. The best part? It requires minimal effort but maximum flavor, making it perfect for busy weeknights when you still want to feel like you've created something special.
Let's get started on this crowd-pleasing dish!
Ingredients for baked chicken with bacon and cheese
Crispy bacon, melty cheese, and juicy chicken—these ingredients transform simple baking into a restaurant-worthy masterpiece.
| Ingredient | Amount | Notes |
|---|---|---|
| Boneless, Skinless Chicken Breasts 🍗 | 1 ½ lb | Pounded to even thickness |
| Thick-Cut Bacon 🥓 | 6 oz | Cut into 1/2-inch pieces |
| Sharp Cheddar Cheese 🧀 | 1 cup | Shredded, block preferred |
| Mozzarella Cheese 🧀 | ½ cup | Shredded, low-moisture |
| All-Purpose Flour 🌾 | ½ cup | For dredging chicken |
| Large Eggs 🥚 | 2 whole | Beaten for egg wash |
| Italian Seasoning 🌿 | 1 tbsp | For spice coating |
| Garlic Powder 🧄 | 1 tsp | Freshly ground preferred |
| Onion Powder 🧅 | 1 tsp | For savory depth |
| Ground Black Pepper 🌶️ | ½ tsp | Freshly cracked |
| Kosher Salt 🧂 | 1 tsp | For seasoning |
| Olive Oil 🫒 | 2 tbsp | For greasing pan |
| Fresh Parsley 🌿 | ¼ cup | Chopped, for garnish |
The bacon makes all the difference—thick-cut is a must for that perfect crispy edge. Oscar Mayer or Applewood smoked from the deli counter are my go-tos, but any quality bacon works. The cheddar should be sharp (not mild) for that tangy bite, and Kraft 2% Milk Sharp Cheddar is my secret weapon for shredding. Mozzarella? Low-moisture is key—it melts better and doesn't make the chicken soggy. For the chicken, pounded breasts cook more evenly, so take a meat mallet to any thick spots. If you're short on time, Costco rotisserie chicken can be used, but trust me on the fresh breasts for that juicy texture.
No thick-cut bacon? Regular bacon cut into 1/2-inch pieces works in a pinch, but it'll be less crispy. Short on sharp cheddar? Pepper Jack at half the amount adds heat and works well. Fresh parsley wilting? Dried parsley at one-third the amount keeps the color bright. The Italian seasoning blend is non-negotiable—it's what ties all the flavors together. No Italian seasoning? Dried oregano plus basil gets you close. And if you're worried about the chicken drying out, brine it for 30 minutes before baking—game changer for juiciness.
This dish reheats beautifully—just pop it in the oven at 350°F for 10 minutes to revive that crispy bacon. Leftovers keep for 4 days in the fridge, but honestly, it's even better the next day when the flavors meld. For meal prep, portion the chicken into containers with a sprinkle of cheese on top—just add fresh bacon when reheating. The bacon pieces crisp up again like magic. Store the shredded cheeses in airtight containers for up to 2 weeks, and keep the bacon in the freezer for up to 6 months.
Why You'll Love This Recipe
- Five-Ingredient Magic: I swear by this combo—crispy bacon, sharp cheddar, and melty mozzarella wrapped around juicy chicken. The flour coating gives it that satisfying crunch without needing a breading station.
- Weeknight Hero: Between us, this is my go-to when I’m staring at the fridge at 6:30 PM wondering what to feed everyone. Toss the chicken in flour, bake it, and the rest is just waiting for the oven timer.
- Leftovers That Don’t Suck: Honestly, the second day is often better. That crispy bacon stays crispy, the cheese pulls back into gooey perfection, and it reheats in minutes—no sad, dry chicken here.
- Budget Crowd-Pleaser: Thick-cut bacon and cheddar might sound fancy, but they stretch further than you’d think. I’ve fed four people (plus my picky teenager) for under $15, and no one complained about the leftovers.
Step-by-step instructions for crispy baked chicken with bacon and cheese
Here's how to create that perfect golden crust, smoky bacon crunch, and melty cheese combo every time.
👨🍳 Step 1: Prep the Chicken with the Ultimate Crispy Coating
Start by pounding the 1.5 lb boneless, skinless chicken breasts to an even ½-inch thickness between two sheets of plastic wrap. This ensures even cooking and that perfect crispy texture. Pat them completely dry with paper towels—moisture is the enemy of crispy skin.
In a shallow bowl, whisk together the 2 whole large eggs, then add the 0.5 cup all-purpose flour, 1 tbsp Italian seasoning, 1 tsp garlic powder, 1 tsp onion powder, 0.5 tsp ground black pepper, and 1 tsp kosher salt. Dip each chicken breast into the egg wash first, letting any excess drip off, then press firmly into the flour mixture to create an even, crunchy crust. Place the coated chicken on a wire rack set over a plate.
🔥 Step 2: Cook the Bacon and Preheat the Pan
While the chicken rests for 5 minutes (this helps the coating adhere), cook the 6 oz thick-cut bacon in a cold, dry skillet over medium heat for 8-10 minutes, stirring occasionally. The bacon should render its fat and become crispy—this fat is liquid gold for flavor and crispiness. Remove the bacon with a slotted spoon and set aside on paper towels, leaving the fat in the pan.
Add 2 tbsp olive oil to the bacon fat in the skillet and heat over medium-high heat until shimmering. This creates the perfect base for that crispy chicken crust. The combination of bacon fat and olive oil gives you double the flavor punch.
🍳 Step 3: Sear the Chicken for Maximum Crispiness
Working in batches if needed, carefully place the coated chicken breasts in the hot skillet. Press down gently on each fillet during the first 1-2 minutes—this prevents curling and ensures even contact with the pan. Cook for 3-4 minutes per side until the crust is deep golden brown and the chicken registers 155°F internally. You'll see the edges start to crisp—that's your signal to flip.
Remove the chicken and set it aside on a clean plate. Pour the rendered bacon fat from the skillet into a measuring cup—you'll need about ¼ cup for the baking step. This fat is the secret to that irresistible crispy top when baked.
🥘 Step 4: Layer and Bake to Melty Perfection
Preheat your oven to 400°F. Lightly grease a 9x13-inch baking dish with a bit of the reserved bacon fat. Arrange the seared chicken breasts in the dish, then sprinkle evenly with the 1 cup shredded sharp cheddar cheese and 0.5 cup shredded mozzarella cheese. Pour the reserved bacon fat over the top.
Bake uncovered for 15-20 minutes until the cheese is fully melted and bubbly, and the chicken reaches 165°F internally. The top should be golden and crispy with cheese pulling slightly away from the edges. If the cheese browns too quickly, tent loosely with foil for the last 5 minutes to prevent burning.
🍽️ Step 5: Garnish and Serve Immediately
Remove the dish from the oven and let it rest for 2-3 minutes—this helps the cheese set slightly. Sprinkle generously with the 0.25 cup chopped fresh parsley and serve immediately while the cheese is still gooey and the crust is crispy. The combination of smoky bacon, sharp cheddar, and creamy mozzarella creates an irresistible flavor profile.
For extra drama, serve with a side of roasted vegetables or a simple arugula salad. The crispy top and melty cheese combo make this dish a showstopper every time—trust me, your guests will be begging for the recipe!
Pro Tips For Making Baked Chicken With Bacon And Cheese
- CRACK THE BACON FIRST: Thick-cut bacon takes forever to crisp—don’t wait until the last minute. Cook it low and slow (325°F) until fully rendered but still pliable, then drain on paper towels. Cold bacon sticks to chicken like glue and won’t crisp properly in the oven.
- SALT THE CHICKEN LONG BEFORE BAKING: I used to sprinkle salt right before baking, and the breasts stayed bland inside. Instead, season both sides generously with kosher salt 30 minutes ahead—it seasons deeper and prevents dryness when the cheese melts.
- DON’T OVERLOAD THE CHEESE: Mozzarella stretches like a sad noodle when it melts, while sharp cheddar clumps. Use a 3:1 ratio (mozzarella to cheddar) and shred it yourself—pre-shredded cheese has anti-caking agents that make it gloppy. Sprinkle lightly in layers so it doesn’t slide off.
- USE FLOUR AS A CRUST, NOT GLUE: Dredging the chicken in flour before baking isn’t just for breading—it creates a dry surface that helps the cheese stick without turning greasy. Pat the flour-coated breasts firmly with your hands to adhere it evenly, then press the bacon directly onto the dry spots.
Troubleshooting great baked chicken with bacon and cheese
Cheese Not Melting
If your cheese stays clumpy or doesn't melt smoothly, it's likely because of moisture or the wrong cheese type. First, make sure you're using low-moisture mozzarella—it melts cleaner than fresh mozzarella.
Also, pat your chicken completely dry before baking, as any moisture will create steam and prevent the cheese from melting properly. Try adding a sprinkle of ½ tsp cornstarch mixed with the cheese to absorb any excess moisture. 🧀
Bacon Too Soft
Crispy bacon is non-negotiable for that perfect texture. If your bacon turns out soft instead of crispy, it's probably because it wasn't cooked long enough or at the right temperature.
Cook the bacon in a cold skillet over medium heat for 8-10 minutes, stirring occasionally, until it's golden and crispy.
If you're baking it directly on top of the chicken, pre-cook it separately and place it on top of the cheese during the final 5 minutes of baking to restore crispiness. 🥓
Chicken Dries Out
Overcooking is the #1 reason for dry chicken. Use a meat thermometer to monitor the internal temperature—remove the chicken from the oven when it reaches 165°F. If you're worried about drying out, brine the chicken for 30 minutes before cooking.
Another trick is to add a splash of 1 tbsp chicken broth to the baking dish before adding the cheese. This keeps the chicken juicy while the cheese melts. 💧
Crust Not Crispy
A lackluster crust usually means the chicken didn't get enough searing or the baking temperature wasn't hot enough.
Cheese Overcooks
If your cheese turns brown or rubbery before the chicken is done, it's burning. To prevent this, tent the dish loosely with aluminum foil for the last 5 minutes of baking. This keeps the cheese warm while protecting it from direct heat. Another trick is to lower the oven temperature to 375°F for the final 5 minutes if the cheese is browning too quickly. 🌡️
Bacon Fat Mess
Too much bacon fat can make the dish greasy, while too little won't add enough flavor. Use about ¼ cup of reserved bacon fat for the baking step—this is enough to enhance flavor without overwhelming the dish.
If you're worried about excess fat, blot the bacon on paper towels before placing it on the cheese. For a cleaner look, arrange the bacon pieces in a crisscross pattern on top of the cheese instead of scattering them randomly. 🍴
Nutrition facts
Frequently asked questions
Can I use chicken thighs instead of breasts?
Chicken thighs work beautifully—they stay juicier and more forgiving during baking. Use 1.5 lb bone-in, skin-on thighs instead of breasts, and reduce the baking time to 20-25 minutes at 375°F. The skin will crisp up nicely, adding extra flavor. Just skip the pounding step since thighs are naturally thinner.
What's the best way to make this dish ahead of time?
Prep everything except the final baking step up to 2 days ahead. Store the coated chicken and shredded cheeses separately in the fridge. When ready to cook, bake as directed but add 5 extra minutes to reheat thoroughly. For a make-ahead shortcut, assemble the dish (without baking) and refrigerate for up to 8 hours, then bake straight from cold.
Can I make this in the slow cooker?
Yes! Cook the bacon as directed, then place the seared chicken in the slow cooker with the cheeses. Cook on LOW for 3-4 hours or HIGH for 1.5-2 hours until the chicken reaches 165°F. The texture will be more tender than baked, but the flavors will meld perfectly. Add a splash of 1 tbsp chicken broth to prevent drying out.
What if I don't have sharp cheddar?
No problem! Use Pepper Jack for a spicy kick or Monterey Jack for a milder flavor. For extra richness, mix ½ cup sharp cheddar with ½ cup cream cheese—it melts beautifully and adds a tangy depth. Avoid pre-shredded cheeses (they contain anti-caking agents that prevent proper melting).
How do I keep the bacon crispy on top?
Cook the bacon separately until fully crispy, then place it on top of the cheese during the last 5 minutes of baking. For extra crunch, sprinkle the bacon pieces with 1 tsp cornstarch before adding them back to the dish. If using pre-cooked bacon, bake it at 400°F for 3-4 minutes to restore crispiness.